
It’s been a while since I’ve been excited about a new brewer. I try my best not to be in upgrade mode. Indeed the V60 I love and adore is almost 4 years old and so is my kettle. If anything, after having dealt with the tricolate I have been even more wary of brewers and associated extraction claims that enter the market. However, when the person I’ve learned most of my brewing concepts from announced his involvement in a brewer’s design, I got curious.
The Astro feature
A while ago Jonathan Gagné kindly allowed me to test a somewhat early prototype of Nextlevel’s then upcoming brewer named Pulsar (thanks to Christopher Feran for the forward). I was a little apprehensive when I first received the prototype because I’d barely learned to love filter again and was hoping that the Pulsar would be a gateway to consistently tasty no-bypass brews unlike my experience with the tricolate (I’ll revisit the tricolate at the end). Jonathan’s theories and findings after all had led me to make better coffee in the past.
Did you get the filters?
I assumed that using my tricolate recipe as a starting point for brewing on the pulsar would be a fair idea. This is pretty close to the bloom + two pour recipe I use for a V60 except the tricolate’s exposed filter area per unit volume of coffee is much lesser than a V60 and is therefore prone to clogging. Not to mention tricolate v2’s shower stream is fairly aggressive and its contribution to fines migration needs to be accounted for. Indeed, I would never shy away from 10-12 minute brews on the tricolate.
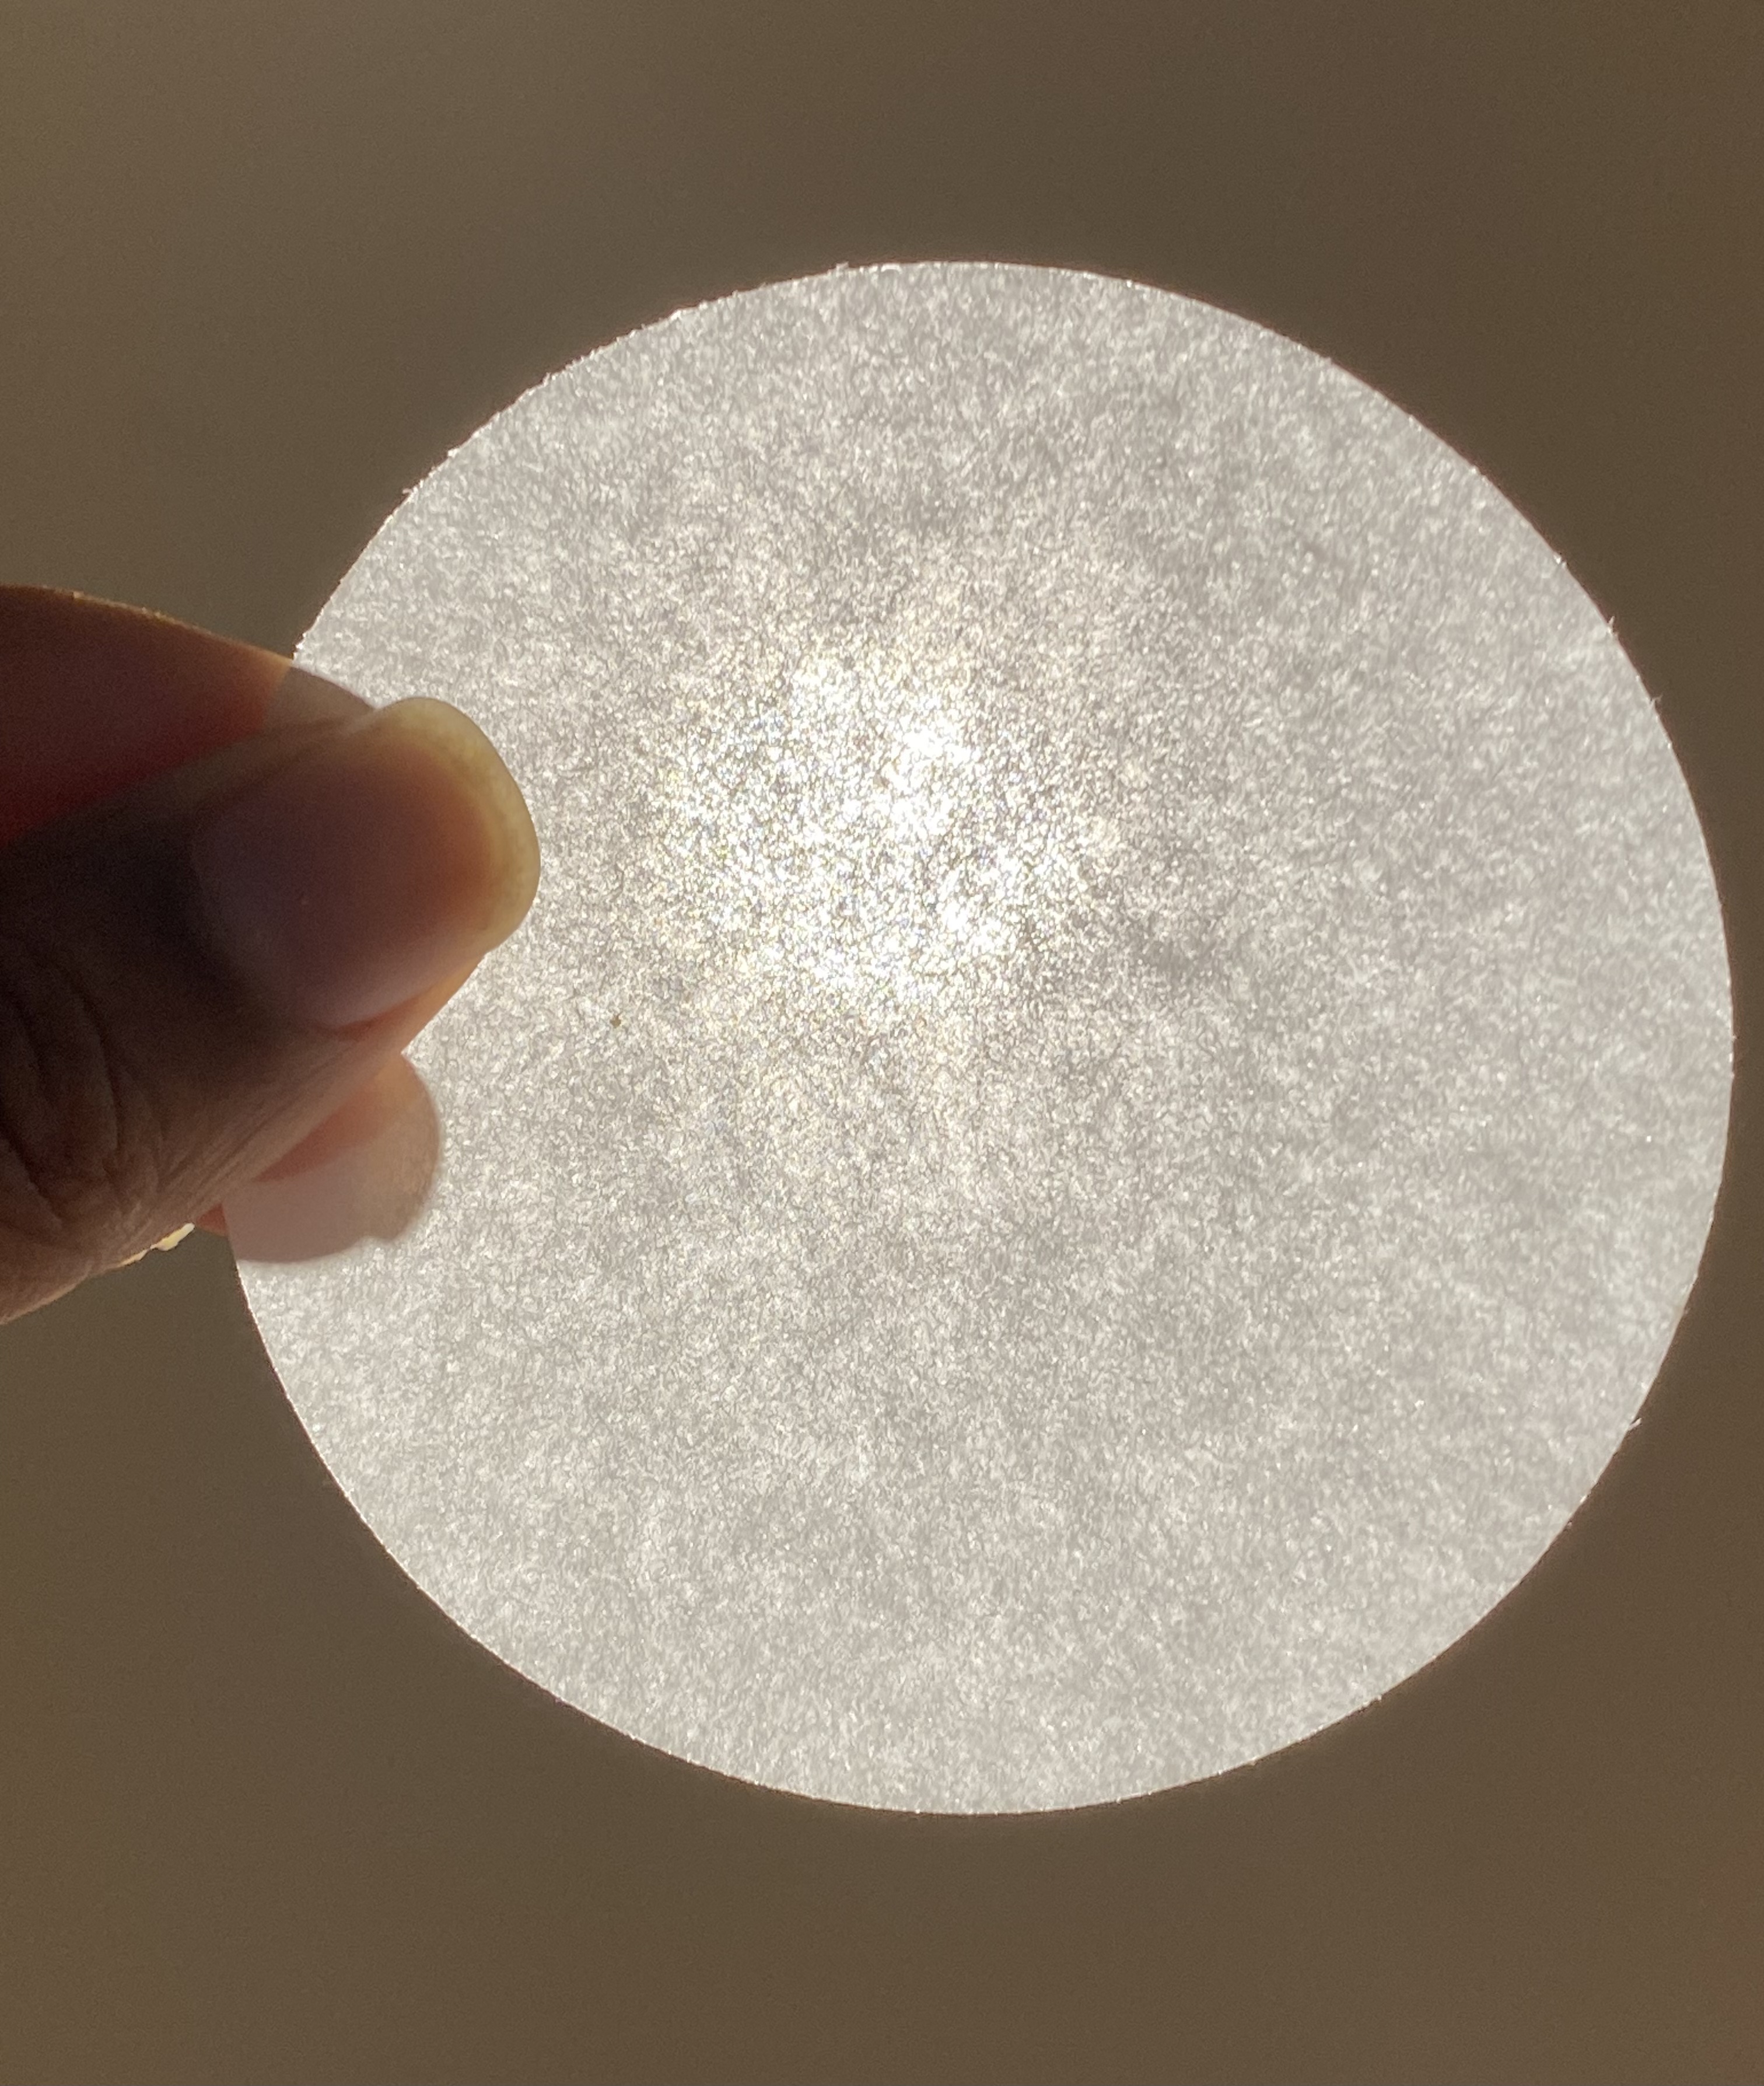
Before I received the prototype Jonathan on more than one occasion asked me to ensure that I received the filters. This seemed a little odd but I didn’t think of it much till I actually started brewing with the device. When brewing with the valve open (to make it behave similar to a tricolate), try as I might, even with aggressive amounts of wet-WDT, I could not slow down the brew. This at first seemed extremely weird, but then the genius of it struck me – the filter has high porosity so that the valve can be the barrier to flow rate as opposed to the filter. In theory, pretty much the only thing the filter is supposed to do is prevent the grounds (and fines) from getting into the brew.
And it seemed to be able to trap a huge amount of fines. That’s not to say that you can’t choke the filter at all. But it took wiping the dust off my old Baratza Encore and brewing with it to be able to slow down the brew, and that too I was only able to do with intense amounts of WWDT (thanks to Lance Hedrick for suggesting checking with a high fines grinder).
A new kind of bloom
While the pulsar isn’t the first device to allow a steeped bloom, it’s the first in which I intentionally used it to that end. Coming from a world of two minute blooms in a V60, I assumed that would be of advantage here as well. However, even with super coarse grind sizes that I prefer for no-bypass situations, I was ending up with a lot of body, which seemed very unusual, and seemed to persist no matter what direction I took in terms of grind size.
This body perception only got exacerbated when I tried doing immersive-percolation. Essentially I was steeping the slurry for about a minute after each pour and then releasing the valve to let it drawdown. This got me wondering – what if steeped blooms allow for an extraction environment where compounds that are responsible for body perception and are possibly hard to extract in absence of sufficient contact time with water, become a lot more easy to extract. This combined with the efficiency of no-byass brewing might explain the presence of tons of body even at super-coarse grind sizes.
To bloom or not to bloom
This created a bit of conflict in my mind. How could it be that blooming in coffee which is so raved about and something that people swear by, can suddenly be problematic? I then remembered something Jonathan had said in passing – the brewing principles he lists are simply meant to be “color theory for an artist to do a painting”. Which in turn meant that attempting short duration blooms isn’t a crime, however much a coffee bro frowns upon you.
This worked! Dropping the bloom to 30 seconds and then focusing on giving the grounds enough contact time brought back the clarity I had been missing (during this time I was exchanging ideas with Christopher Feran and I think his v60 recipe that constitutes a short bloom gave me some confidence that this is a fair approach). There was however another aspect of a no-bypass brew I hadn’t throught about prior to the pulsar. While a tricolate’s filter didn’t allow for short enough drawdowns despite however much you tried to reduce drawdown time, the pulsar didn’t suffer as much from this limitation. If a no-bypass steeped bloom is so efficient, what if we brewed a no-bypass bed at the same grind size as a v60, only with less contact time.
Making a V60 but better
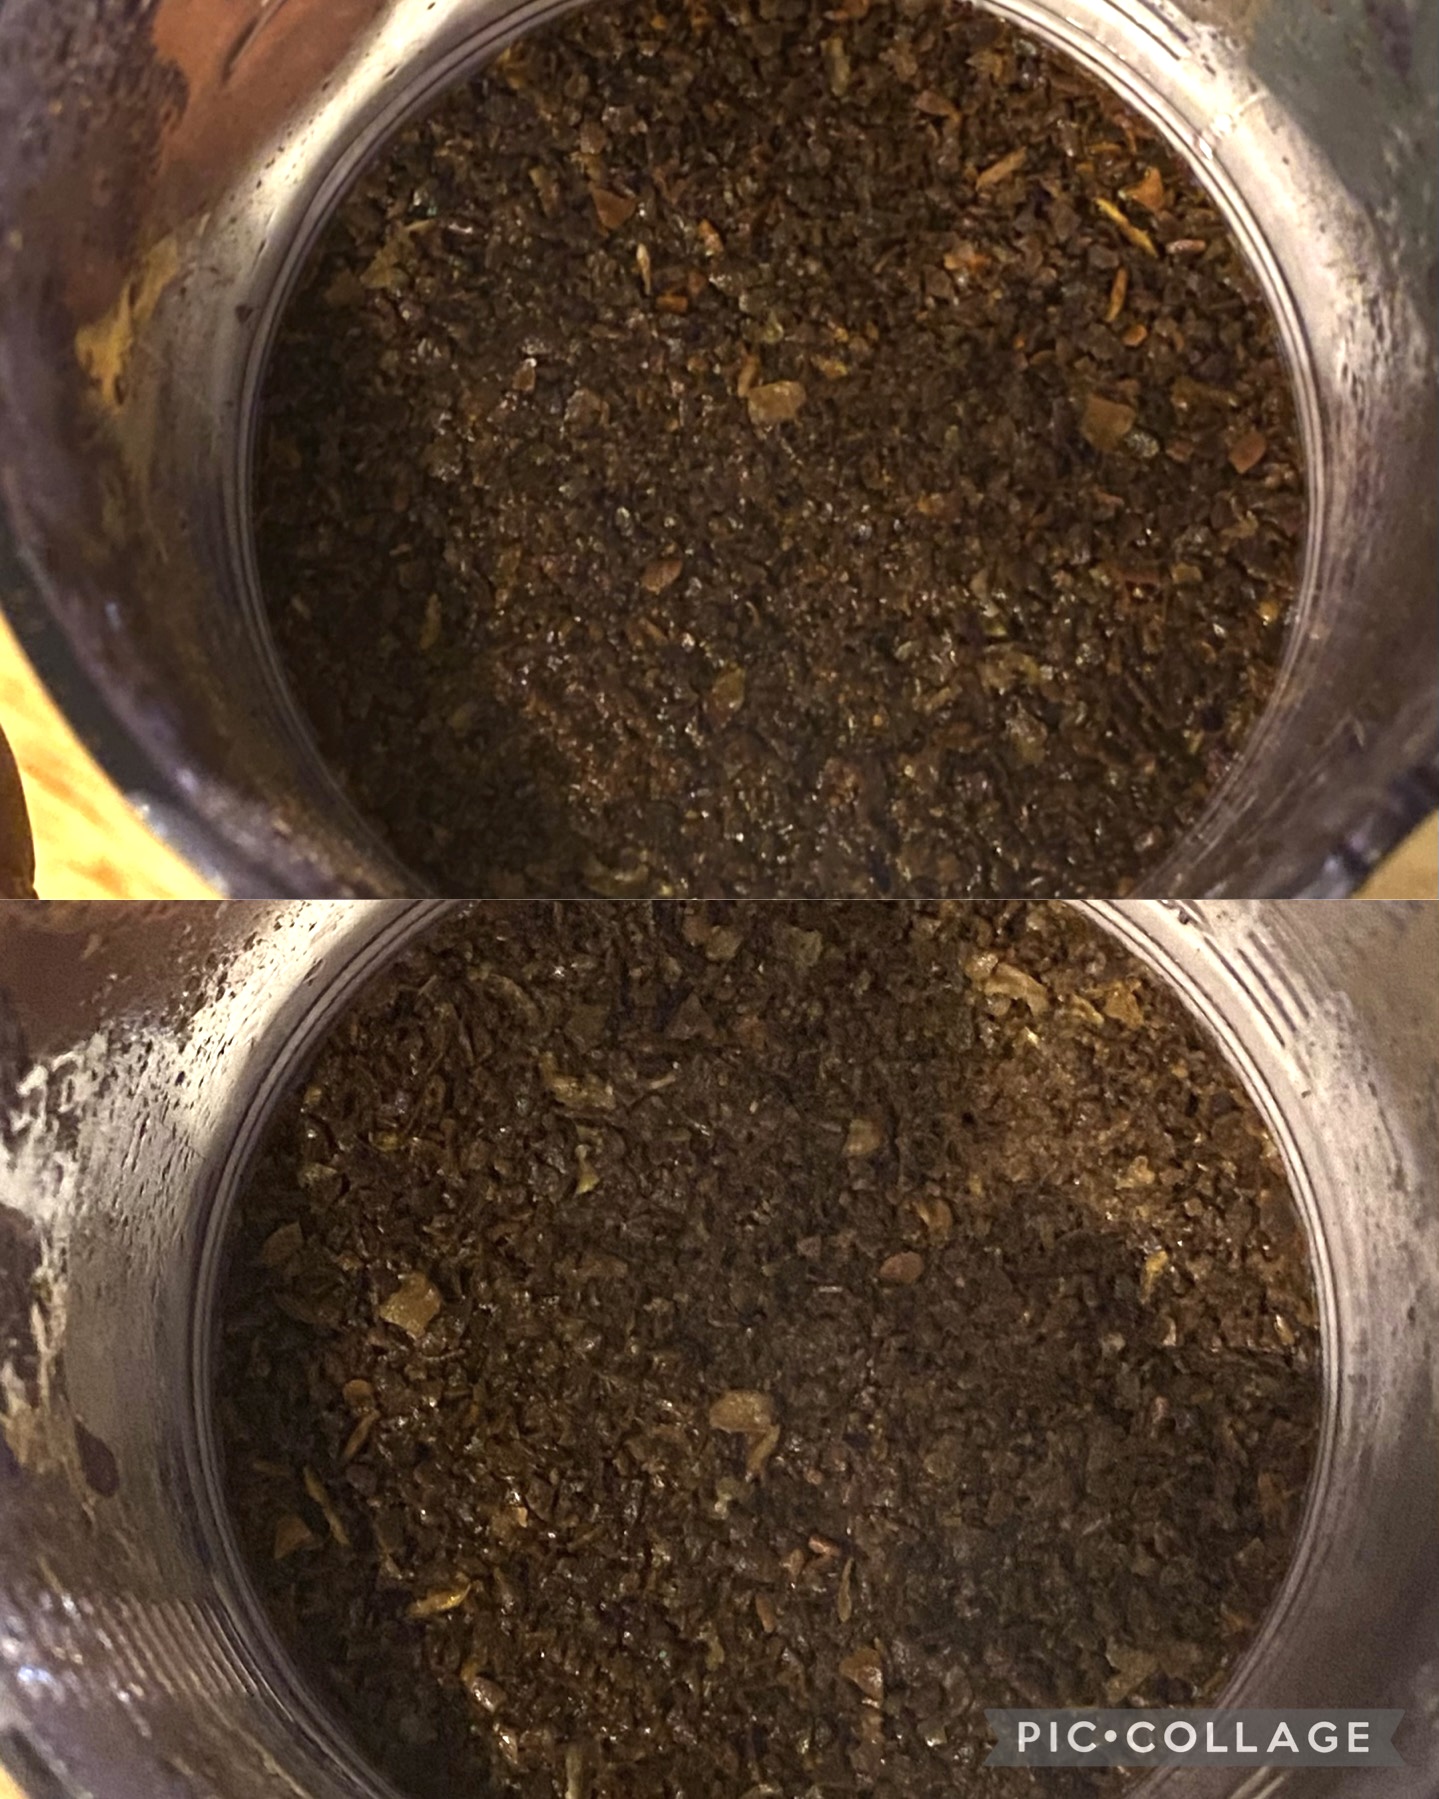
The grind size I finally settled upon turned out to be just slightly finer than a v60, brew time excluding bloom almost a minute less than that of a v60. This combined with reduced bloom time meant my pulsar brews are usually around the 3:30 mark, assuming I’m targeting the same extraction yield (EY) in both cases. But what about taste? I don’t think I’ve ever had filter brews that are as vibrant as the ones I get from a pulsar. I do not say this lightly. After all, I’m super proud of my low-cost high clarity v60 recipe. After all, the tricolate made me miserable before it made me happy and then miserable again. But this was unlike either of them. If anything, the pulsar has allowed me to execute brews with very low EY variance even for 15g doses.
And I think this was unexpected. I don’t necessarily find 15g brews in a V60 to be consistent in terms of EY and taste, whereas a tricolate made a nightmare out of anything smaller than a 20g bed in terms of consistency. It’s not that the v60 made bad 15g brews, they just never tasted as consistently good as my 20g brews. As you will soon see, this isn’t because of the finer grind usually necessitated by a 15g dose, but just the inherent unevenness of water flow in a v60, with the extent of fines migration less controllable with WWDT due to a limit of how deep the needles can get before tearing the filter.
In a pulsar however, one can use the water column to level the bed with the valve closed. This means that while the tricolate has about the same bed diameter as the pulsar, a lot of the water has already passed through the bed before you can make a swirl that’s efficient enough to level the bed in case of pour sizes one would usually use for 15g doses. In a pulsar however, holding the base and swirling does miracles in terms of flattening the bed before you release the valve. Worst case, you can level it with a wdt tool while keeping he valve closed.
The resulting brews are so vibrant, juicy and evocating of happiness that I’m finding myself reaching for the pulsar time and again, even though I have an arguably lower effort way of brewing the same 15g of coffee.
The recipe
The following recipe was developed for a 15g dose but will work well for larger doses as well:
- Weigh out your dose to within 0.1g of target
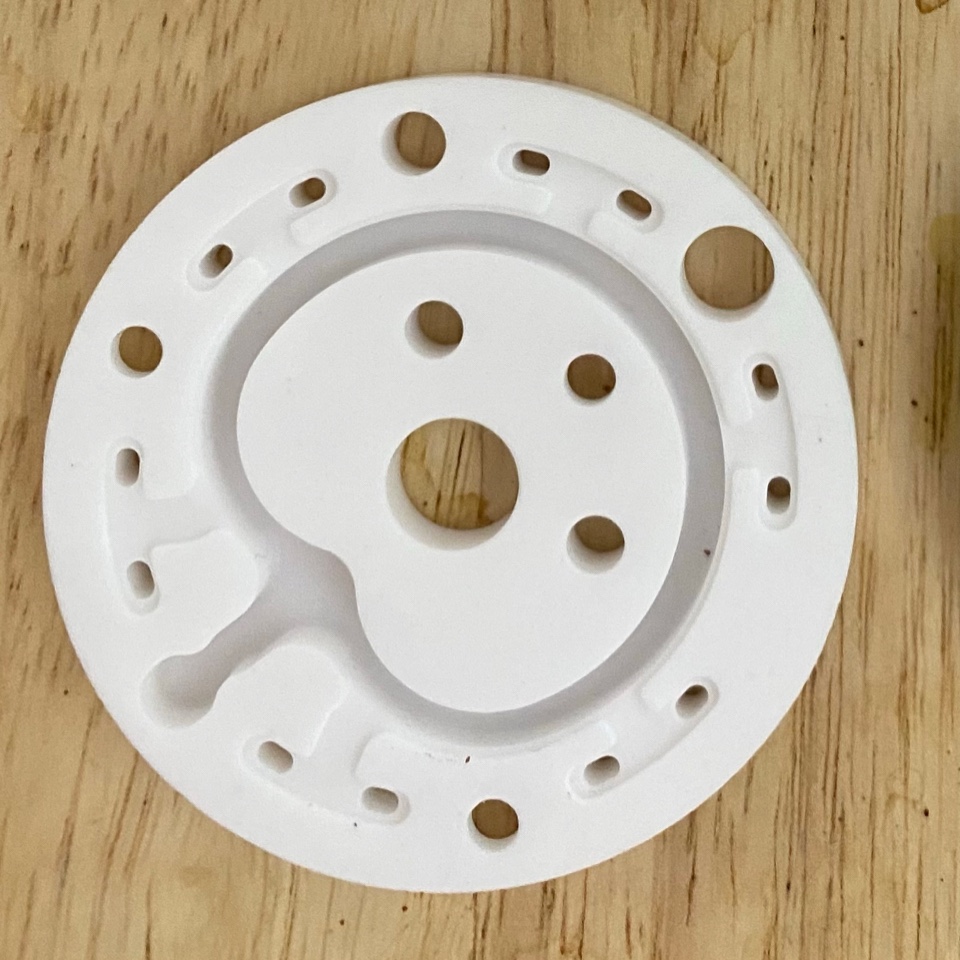
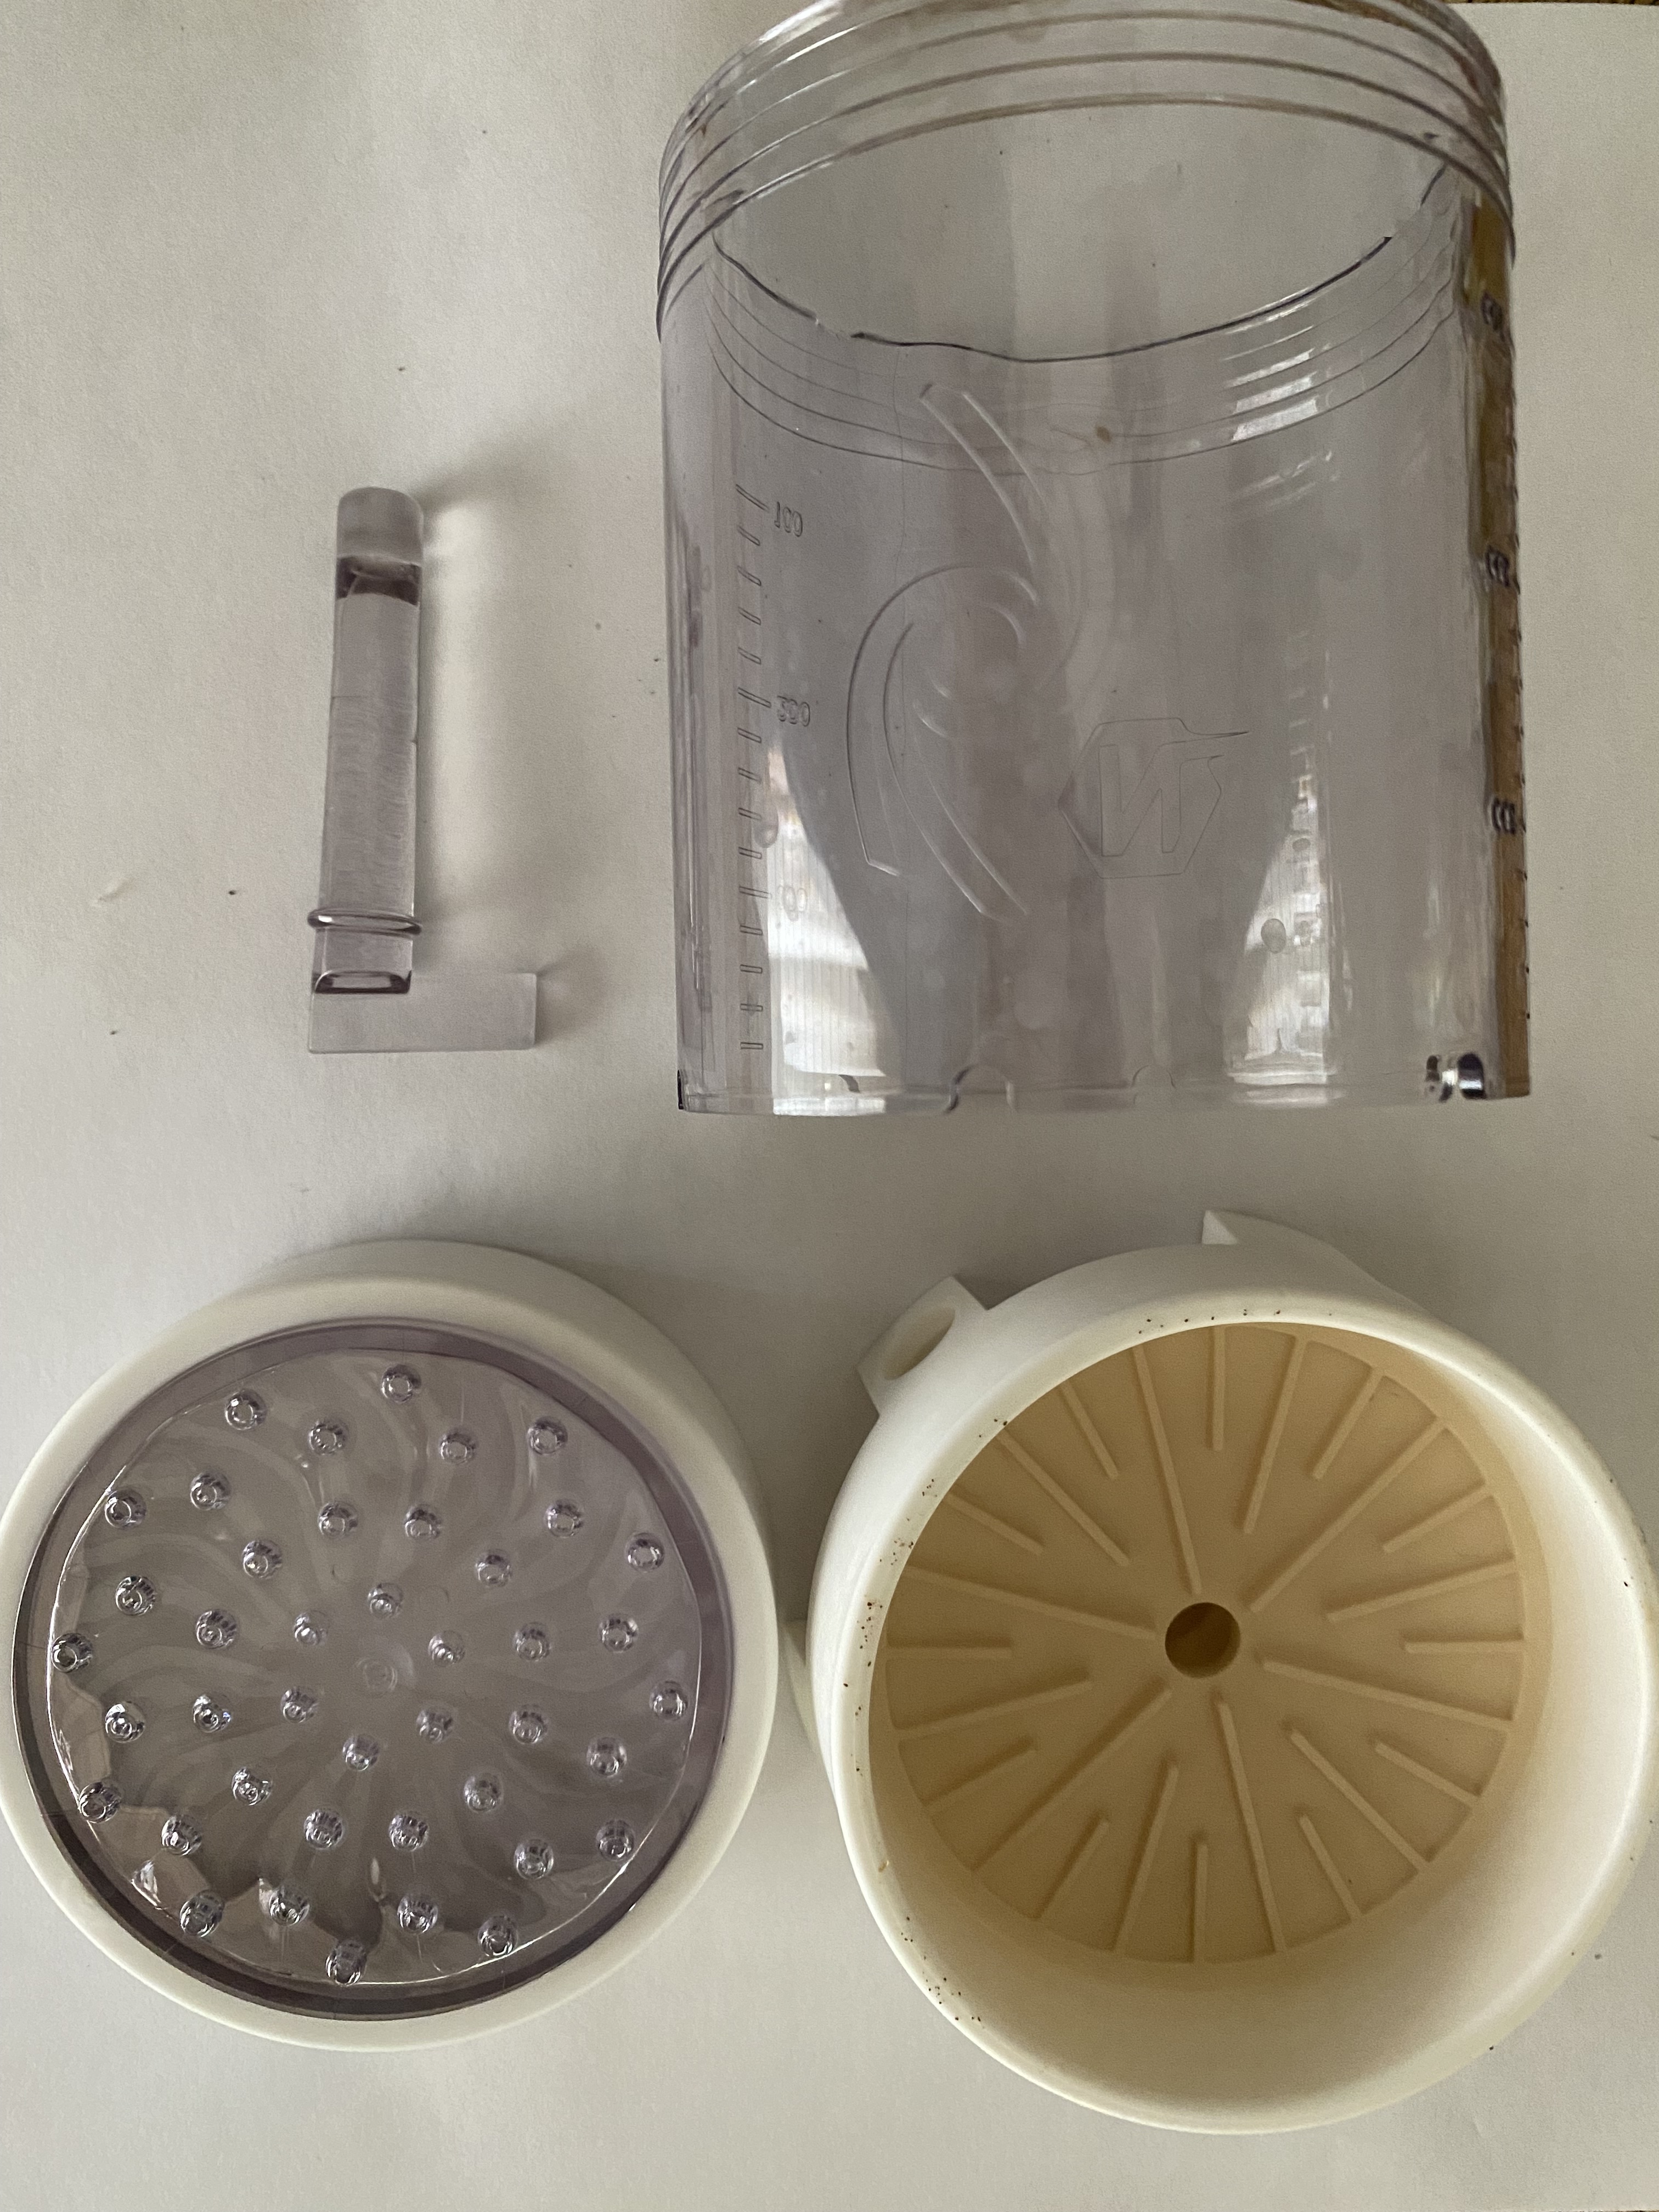
- Without the barrel attached, rinse your filter with valve closed (I personally haven’t found a difference between doing filter first or water first). Open the valve and drain the water. Your filter should now be firmly seated on the ridges.
- Plug in the barrel/brew-chamber/cylinder.
- Grind coffee at 600 um from burr lock and dump it in the brewer.
- Use a WDT (dry-wdt) to declump the bed and level it.
- Put the shower screen on and tare your scale.
- Close the valve, start the timer and pour water upto 4x the weight of dose.
- Remove the shower screen and gently WDT (wet-WDT this time) the slurry so as to saturate the bed. Keyword gently.
- Hold the base of the brewer and give it a swirl to level the bed. Open the valve fully to drain the bloom. I prefer finishing all of this by no more than the 30 second mark.
- Close the valve again, put the shower screen back on and pour upto 65% by weight of total target water weight.
- Hold the base of the pulsar and swirl to level the bed.
- Open the valve partially (I like being between 1 and 2 o’clock position) and let the slurry drain till you see just a little bit remaining above the bed (it’s okay if you sometimes get distracted and overlook this last bit).
- Close the valve and pour upto target weight (I prefer 1:17 ratio but ymmv depending on coffee, grinder, roast aspects and preferences).
- Swirl and open valve to same position as before to let it drain fully.
- Attempt finishing second drawdown by 3:30 for a 15g dose and 4:30 for a 30g dose.
Possible variations:
- Grind coarser if your brew tastes muted
- Steep the bloom longer if you need a bit more body.
- Steep your pours longer if you need more body than you know what to do with.
- Grind coarser for larger doses. A good rule of thumb is coarsening by 50um burr gap for every 5g additional dose
- Allow longer brew duration for larger doses. A good rule of thumb is 15 seconds extra for every 5g extra dose. Note that your bloom will also take longer to drain (don’t be too stressed out though – you’ll figure out your own preferred brew durations as you go along).
The future is here
I do foresee more and more brewers adding steep-and-release mechanisms to their designs, although I do expect a lot of them to be inconsiderate enough to not include high-porosity filters to go with it. This is not to say that the pulsar is perfect. For example I would have preferred a way of putting on and taking of the barrel that has less chances of making a mess out of the spent bed if one is not careful. Also when will small doses get some love among brewer designers. Not all coffee aficionados have high caffeine tolerance, and I dream of a day when 10g doses give repeatable brews. Maybe Nextlevel can make a thinner barrel that fits in the Pulsar’s base to allow us to enjoy the brewer a bit more.
For those looking for workflow tips, Aramse have a done a pretty good job of it in their video of the brewer. Jonathan also talks a bit about it on his recipe blogpost and I’d highly encourage anyone who buys the pulsar to peruse the short TLC manual that comes with it.
Whomst Tricolate
At this point I’m very tempted to drop my tricolate off at my recylcing plant if they accept the material. In the time that Nextlevel has come up with two functionally unique brewers, Tricolate has come up with three new colors (tbf they’ve improved water dispersion in their third iteration). I cannot say that spending money on something that has lived solely on the hype of super-high extraction yields is something I’d recommend.
The pulsar on the other hand has been rendering deliciously vibrant and tasty brews, brew after brew, with their filters not costing an arm and leg when the time comes to replenish them.
Acknowledgements
- Jonathan Gagné for lending me the prototype and for helping the coffee community push boundaries of brewing since 2018.
- Scott Rao for ensuring that pulsars get to us despite logistics hiccups
- Christopher Feran for a lot of back and forth on blooming.
If you’ve enjoyed this post, consider donating to Brit Alexandria (author of TheNonbinaryBarista blog, and a voice for queer, neurodivergent and disabled people in the industry) who’ve fallen on some difficult times.
Subscribe to keep your pocket updated with coffee science.

Leave a comment