In this post I talk about the cheapest setup combined with a recipe one needs to make high-yielding delicious coffee consistently (excluding grinder). Since we’re compromising on equipment, we’ll be compensating with lots of nerdery, most of which is based on the application of concepts in The Physics of Filter Coffee by Jonathan Gagné.
Things you’ll need
- Plastic V60 ($10)
- Electric kettle ($10)
- WDT tool ($10-$20)
- A spoon
- A scale that measures upto 1g ($10)
- Bleached cone filters (tabbed ones are cheapest and work just fine)
Reasons behind choosing each piece in this kit:
- V60 – It’s the cheapest available brewer I know of that can extract high and consistently at that. Double bonus that the plastic version is cheaper and retains heat better
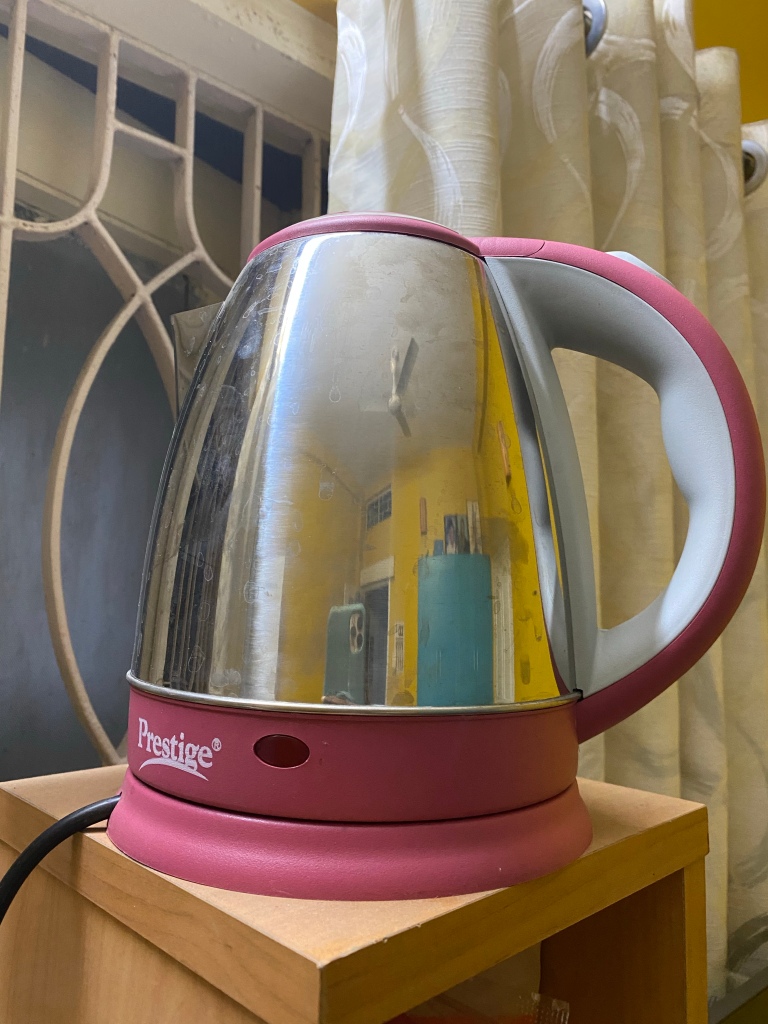
- Electric kettle – Any vessel that boils water is fine, a kettle just makes it easier, an electric one allows you to be away from a stove. You don’t need a gooseneck.
- WDT tool – You’ll need this for wet-wdt. You can either make your own by sticking 3-4 acupuncture needles spaced apart 1 cm into a cork, or purchase a cheap one from an online retailer. Having a narrow needle spread for a V60 helps. You’re gonna use the wdt to induce agitation in lieu of the kettle
- Spoon – any spoon is fine as long as you can get it close to the coffee bed to break the kettle stream. I’ll discuss in more detail later why this is important
- Scale – The days of eyeballing a brew are long gone. 1g precision scales can be found for relatively low prices
- Bleached v60 filters – You don’t necessarily need aftermarket filters to get delicious brews. I’ll talk at length about the choice of filters later on in the post
The theory
There’s a few pocket-sciencey things I want to get out of the way before we discuss the recipe. First, I’m a firm believer that grinding coarse can lend itself to higher flavor separation brews more consistently. This does not mean that grinding fine won’t give you high clarity brews, but more often than not I’ve found it easier to mute my drinks when grinding too fine or worse, run into intense amounts of bitterness due to combination of flavor components that would not have extracted as easily with coarser particles being in the mix. So my recommended approach will be at all times along the lines of being able to extract the most possible from a super-coarse grind distribution.
Second, I have anecdotally noticed that any form of agitation that dislodges more fines into the part of the slurry above the bed and results in deposition of fines in a clay-like manner above the coffee bed and on the filter walls, also lends itself to brews that have higher perceived body. Whether or not such a taste profile is preferable is a completely personal choice. I just think it’s good to have a way to control the extent of it. My proposal for high clarity brews therefore solely based on this unverified conjecture is to induce fines migration but in a way that does it within the volume occupied by the coffee bed, so we can not only use the bed to trap fines like it does, but possibly also compounds that lend to increased body perception.
Almost all of the rest of this discussion will focus on controlling the extent of fines migration in a V60 (but can be applied to any brewer under the sun). The idea of being able to have fine grained control over fines migration had been at the back of my mind for a while, but when Lance Hedrick used a spoon to stir his bloom in his latest (as of writing this) percolation recipe, it struck me that his catch-all recipe was intended to lend itself to high fines grinders, and using a spoon to gently agitate allowed him to saturate the slurry while dislodging less fines than a blooming swirl. His idea of a center pour that does not agitate grounds outside of a small diameter is also along similar lines of thought, but necessitating a low pour rate means having access to a kettle that can pour slow from a tall height.
Instead, what if one can saturate the grounds more thoroughly than a spoon and while doing so can manage to migrate the same amount of fines for both a high fines and low fines coffee? What if one can avoid spending on a $150 gooseneck kettle for the perfect pour rate but still get enough contact time despite using coarse grinds?
Needled 24×7
The idea of replicating the gentle agitation of a spoon with a wdt tool came to me when I was brewing a super high fines coffee. While I had used wet-wdt (referred to as WWDT hereon) to increase fines migration for low fines grinders before, the same idea can be applied to wet the grounds either without dislodging too many fines or dislodging a large number of fines to end up with the same drawdown time across different coffees for the same grind size. However this would also need an approach during the larger pours that would not dislodge additional fines (or only dislodge minimal fines).
I was brainstorming this on Lancecord when user Sarva pointed out that Aramse had used a spoon to break the kettle stream and avoid bed disruption in their Sofi 72 video. Not only is this a stroke of genius to make brewing more accessible, but is effectively a substitute for something like a Melodrip. This also implied that a kettle could be replaced by any vessel that can pour water (although I’d highly recommend something that has a spout so you can avoid scalding).
The recipe
A few days ago I made a video demo of the technique I outline below both on Instagram and Youtube in case you want to watch along as you read.
So here’s the recipe along with possible ways to vary each step to push extraction in a direction you desire.
Step 1: Weigh out 20g to a precision of 1g. While I know most recipes online stress on 0.1g, the key thing here is to not significantly alter your bed height. What will be more critical is whether or not you adjust total water poured to keep ratio the same (so if you use 19 instead of 20g, and 1:17 is your desired ratio, pour 320g of water).
Step 2: Boil at least 500g water (assuming 20g dose). You’ll need about 100g to rinse and adhere the paper (an alternative is to do it under the faucet as Lance Hedrick shows in his many videos).
Step 3: Grind your coffee. Conveying grind size is tricky but some useful numbers as a starting point are 700 microns from chirp on a flat burr grinder, 6.0 on a calibrated 1zpresso zp6 and 8.5 on a calibrated 1zpresso K-series. Make sure to purge a few beans to facilitate exchange.
Step 4: Put your brewer on a cup or carafe. Tare your scale. Dump beans gently into brewer and make sure you have expected amounts of grounds in there. Do not make a trench with your finger. Since we’re doing WWDT, you want the water to face some resistance during bloom and having the bed flat as opposed to being excavated is more helpful that way. Start your timer.
Step 5: Hold a spoon as close as you can to the bed and pour at least 4x of boiling water onto the spoon in a way that it breaks the water stream and doesn’t agitate the bed. Set your kettle/boiling pan down carefully and quickly pick up your wdt tool and agitate the bed in circular motions. The intensity of WWDT will be totally dependent on your coffee, grinder and filter. Think of it this way – if yours is a traditionally high fines coffee from Ethiopia (note that in today’s day this is more a stereotype than norm due to advent of newer processing techniques), you want to be as gentle as you can with WWDT because even slight amounts of gentle movement will dislodge enormous amounts of fines, enough to provide necessary resistance to later drawdowns. If on the other hand you have a low fines coffee like something that’s been processed in reduced-oxygen environment (again I’m stereotyping a bit), you’d want to be as aggressive as you can with WWDT. Here’s where having a low needle flare wdt (i.e. one with with less spacing between needles like say 1 cm) works wonders for a v60 to be able to WWDT both aggressively and going deep while at it and still not tearing the filter.
Step 6: Wait till the two minute mark. This will have a tangible effect on extraction and I’ve found such a long duration immensely beneficial for coarse grind brews in a V60.
Step 7: Pick up the spoon and pour boiling water onto it in a way that not only breaks the stream, but also ensures that the spoon stays close to the slurry surface as the water colulmn rises. This is the easiest way I’ve found to be able to avoid additional fines migration due to water flow. Pour to about 220g total pour weight (adjust based on dose). You may still see some grounds get perturbed and that is fine. Once you reach desired weight, put the kettle/pan down carefully and swirl the slurry to flatten the bed. If this doesn’t dislodge all grounds from the walls, don’t stress over it, just do a back-and-forth or side-to-side Hedrick-shake. This usually should dislodge larger boulders efficiently. Avoid swirling the slurry once water height gets low because that may cause additional fines migration but in an uneven way (the top of the bed will probably migrate more fines than the bottom when swirling). If your slurry has drained too fast, do WWDT when the slurry is about a centimeter above the bed. This will allow you to take the needles deeper and ensure that fines migration across the height of the bed is as even as possible.
Step 8: Pour the rest of the water weight (340g if you dosed 20g). Put your kettle/pan down carefully and follow the same guidelines as Step 7 for ensuring a flat bed and disloding boulders from walls. I usually like to remove the brewer once the water column has disappeared. I timestamp this as “total-brew-time” (TBT). For a 20g dose I recommend TBT of between 5-6 minutes
Step 9: Stir your brew. If you can decant, that’ll help you cool faster, but avoid sipping when hot because it’s hard to judge taste until it’s cooled down a bit.
Possible adjustments:
- Bloom duration: If your coffee has components like intense nutty or woody flavors inherent to the coffee taking over taste, consider blooming for no more than 30 seconds (incl. water pour and wwdt).
- Number of pours: While I usually prefer two non-bloom pours, for some coffees with low fines generation it might be prudent to instead do three pours where the first post-bloom pour is geared towards supplying more water to enable wwdt.
- Smaller pours: Very much along the lines of the previous variation, the amount of water you deposit during a pour determines your water clomun height and a taller column will translate to faster flow through the bed and therefore possibly less contact time. In absence of enough fines to clog the filter, this could be a neat alternative. It might come at the cost of reduced slurry temperature.
- Lid during drawdown: If slurry temperature is a concern esp. on cold days (or if you live in Canada), consider putting a lid atop your brewer during drawdown. I haven’t found it to be disruptive to the brew, although I would recommend slicing off at least a centimeter off the top end of your filter so the lid doesn’t inadvertently disrupt it (and therefore the bed).
Is this river rocks
There’s a few situations you may encounter where you have no option but to grind finer. Both of these are related to how the beans shatter. Some coffees will not generate enough fines for you migrate no matter how hard you try. In such a situation you won’t be able to provide sufficient contact time that is needed by coarse regime and solubility will therefore need to be achieved by grinding finer.
Conversely sometimes you may end up in so coarse a grind regime that the boulders generated do not extract sufficiently despite however much contact time you provide it or how much water you pass through it. Again, you’ll need to grind finer to make some of these boulders smaller for more efficient extraction.
Too many filters
A lot of you reading this are bound to ask – what filter is appropriate for this technique. And my answer is any filter that is accessible and allows you for the contact time needed for this technique is the right one. I’m personally a big fan of v60 tabbed papers usually available for dirt cheap as two or three-packs on Amazon. Also remember that a filter’s porosity isn’t only about the amount of fines it traps but also the speed with which it allows water to flow through it. This gets wildly complex for a conical filter as this implies different amounts of bypass for different filters along the height of the dripper, and that in turn will affect slurry composition as it passes through the bed. Filters will probably get their own post some day.
Is it worth all this faff
I don’t recall consistently enjoying V60 brews on a sustained basis as much as I have with this technique. It used to frustrate me that doing consistently tasty and high extraction brews needed spending USD 150 on a kettle. While such kettles are an excellent design and there’s posts and videos dedicated to the art (rather science) of a good kettle pour, USD 150 is a huge expenditure in most parts of the world. If there’s money to be saved that can go towards a good grinder or more coffee, I’m all for it.
As far as grinders go, it’s frankly quite amazing that hand grinders have brought about a revolution in terms of taste options at significantly lower prices than before. For example a Kingrinder K0 which retails at USD 35 can make tasty brews with this technique and has no business having thw build quality and taste it does at that price. It’s however nowhere near the flavor separation of something like an 1zpresso Q2 heptagonal grinder, which is far more expensive at USD 90 but having saved some money on a gooseneck kettle, it is something I would strongly consider.
Is 6 minutes the new 3 minutes
Every decade in coffee making comes with its own set of dogmas that must be questioned. For example all the folks pushing three minute brew times also slurp from the same bowl for twenty to thirty minutes when cupping. Not that a three minute brew is wrong, but it’s a parameter that’s arguably more useful in a cafe than at home.
Similarly we obsessed with pushing extraction for so long that we forgot how ridiculously magical a cup of coffee can feel if you let go of extraction yield by one percent and think about that cup of coffee for the rest of the day. This method is obviously not geared towards cafes. If anything even the dedicated home barista will at first feel awkward not doing much for most of the brew duration. But this technique has always rewarded me for my patience and I hope it does so for you as well.
TL;DR
- Tasty coffee can be brewed for cheap consistently without a gooseneck kettle and a $10 v60 with a wdt tool
- You can increase or restrain fines migration with level of wet-WDT aggression
- If avoid agitation outside of wet-wdt you can break the kettle stream with a spoon
Acknowledgements
Christopher Feran for continued encouragement to pursue an approachable technique to percolation brewing tasty coffee that can be replicated.
If you’ve enjoyed reading this post, consider donating to NOT me but instead on the occasion of Juneteenth to Cydni Patterson:

Consider subscribing to keep your pocket filled with coffee science.

Leave a comment