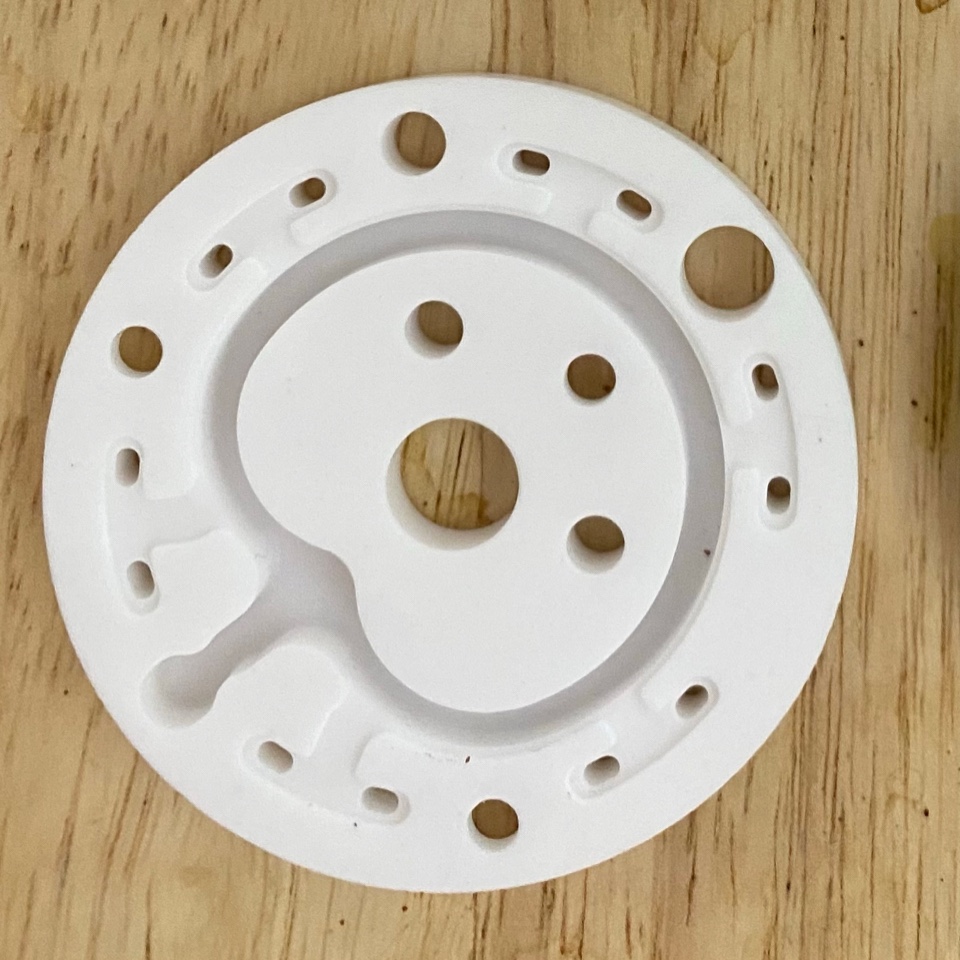

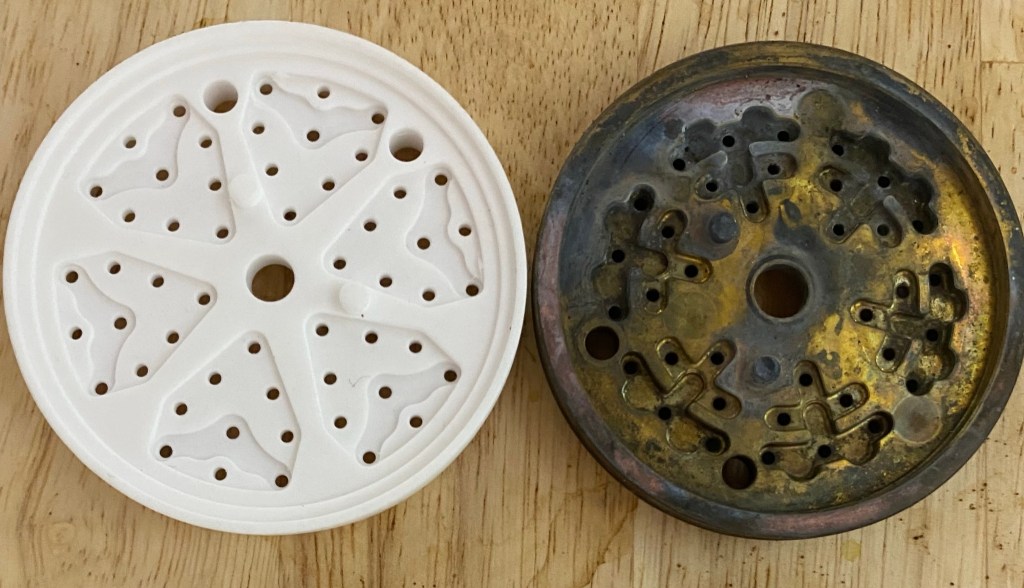
Skepticism is a weird deal. Too much can stunt innovation and too little can, well, lead to too many pocket theories. Lance Hedrick is among the few who seems to take a balanced approach based on both data and experience. So when I claimed in my debut post that Decent’s new dispersion block design was pushing significant amounts of water to the edge of the basket during extraction, he reached out to say “Cool story bro, but have you tested if your theory is true using cookie cutters?”
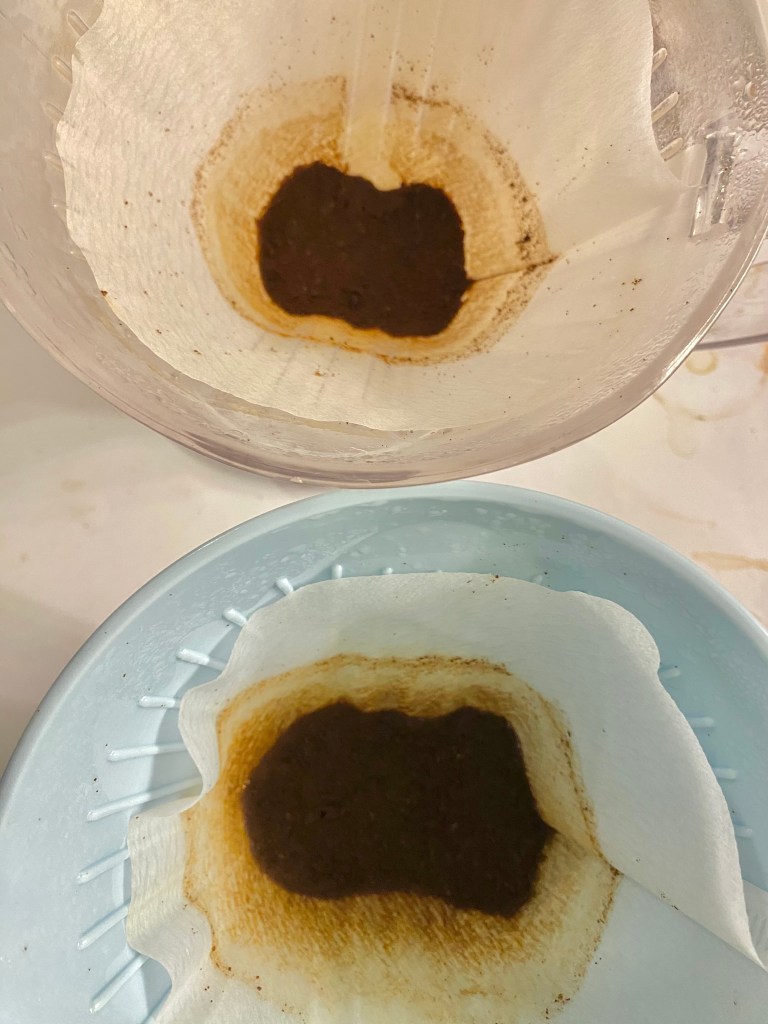
For those wondering what cookie cutters have to do with espresso, the idea is that one can use cookie cutters to do concentric cutouts of spent pucks, and brew said segments separately to calculate how much was remaining to be extracted by the time the shot ended. The idea was arguably popularized by Stéphane Ribes, in his now famous posts on radial extraction uniformity, so I reached out to him to learn how he did the somewhat complex calculations after extracting the spent puck cutouts. Stéphane’s findings (and more recently Lance’s) had shown that puck screens on top of an espresso puck potentially lead to more even water flow through a puck by allowing for more water to pass through the edges of the puck.
Espresso is difficult, analysis even more so
One of the biggest questions that would pop in my mind when pulling shots for this experiment is whether dispersion blocks should be the only things I should compare. After all, espresso extraction has been blessed by a myriad of accessories claiming to do miracles when it comes to extraction. To choose which ones are worthy of one’s time and effort (especially given that the former is hard to come by and the latter is hard to come up with amidst a day job and kids), can be a tricky thing. I therefore decided to go outside of the scope of dispersion by just a tiny bit, by including anything designed or geared towards potentially improving edge extraction:
- dispersion blocks (new vs. old)
- puck screen vs. paper
- modern high hole coverage basket (sworks high flow) vs precision basket (vst18)
- filtered vs. unfiltered tds variance
- turbo vs boomer shots (in limited scope)
There are obviously many other things that affect edge extraction that I wish I had the bandwidth in this round to talk about. But you’ll soon see why it would have made it more difficult with the number of combinations. Some of the ideas I chose not to do altogether or postpone for future analysis and comparison are:
- Paper at bottom (extensively researched by Gagné, Stéphane and Shay among others)
- Porcupress/Hog (Stéphane and Shay both have analyzed and theorized about it)
- Waisted baskets
- Shower screens (Mat North talked about it about a decade ago)
- Tampers (Stéphane has a few findings, so does Michael Cooper)
Permutations and combinations
With some idea of what would make a fair dataset, I chose to do 5 shots for each of the following combinations:
- sworks high flow basket + new dispersion + puck screen + 64MP + turbo shots
- sworks high flow basket + new dispersion + paper on top + 64MP + turbo shots
- sworks high flow basket + old dispersion + puck screen + 64MP + turbo shots
- sworks high flow basket + old dispersion + paper on top + 64MP + turbo shots
- sworks high flow basket + new dispersion + puck screen + Niche + boomer shots
- sworks high flow basket + new dispersion + paper on top + Niche + boomer shots
- sworks high flow basket + old dispersion + puck screen + Niche + boomer shots
- sworks high flow basket + old dispersion + paper on top + Niche + boomer shots
- vst18 + new dispersion + puck screen + 64MP + turbo shots
- vst18 + new dispersion + paper on top + 64MP + turbo shots
- vst18 + new dispersion + puck screen + niche + boomer shots
- vst18 + new dispersion + paper on top + Niche + boomer shots
You may have noticed that I didn’t include the following combinations:
- vst18 + old dispersion + puck screen + 64MP + turbo shots
- vst18 + old dispersion + paper on top + 64MP + turbo shots
- vst18 + old dispersion + puck screen + niche + boomer shots
- vst18 + old dispersion paper on top + niche + boomer shots
And the reason for it is as simple as life and mental health took over. Between when I took a couple of days break and when I actually was ready to pull more shots, more than a few weeks (read months) had passed, and in absence of having single dosed and frozen the coffee, I think it would have introduced bias in the results. Hopefully the workflow gives more context.
Workflow
This can be broken down into different parts. Let’s first talk about the coffee used. Instead of relying on one single coffee, I decided to put to use coffees that were at between 6-10 months past roast date, specifically roasts I hadn’t liked and thought would be put to good use for experiments like this. All of the roasts used were within the range of what’s considered “light” to “medium light” (think of the former being the more developed end of Nordic roasts, and the latter being the lighter end of American roasts), and blended together vigorously to ensure homogeneity. There’s positives and negatives to this approach. At such roast age there’s less correlation with puck resistance caused by CO2 release, so water flow is affected, but the assumption here is that it should still highlight differences between dispersion blocks and puck screens. There’s an advantage though – aged roasts aren’t changing dramatically from one week to another to affect puck resistance dramatically.
Next comes espresso brewing. The following steps were followed to reduce possibility of error:
- Each dose was weighed out to within 0.1g of 18g target, measured after tamping (grounds can stick to/get trapped in a tamper)
- Beans were ground as hot start in both Superjolly and Niche
- Puck prep consisted of WDT as described in this video (except for the tap), and then two tamps using a Force Tamper with a flat tamping base.
- No tapping was done after WDT to avoid introducing uneven density pockets and bias results
- A puck screen was then gently slid onto a puck for shots involving a puck screen, and a paper for those involving a paper.
- The portafilter was then gently inserted and locked into the grouphead.
- I allowed a shot time range of 13 to 17 seconds for turbo shots, and between 35-45 seconds for boomer shots.
- To allow analysis of more realistic recipes, turbo shots were only pulled using 64MP for an in:out of 18:40. Boomer shots were only pulled on a Niche for an in:out of 18:45. The outputs were geared towards ensuring that each burrset extracted to an optimal amount.
- All shots were pulled with a flat 6 bar profile on a DE1 with stop-at-weight used to ensure the output stays within 1g of desired target weight.
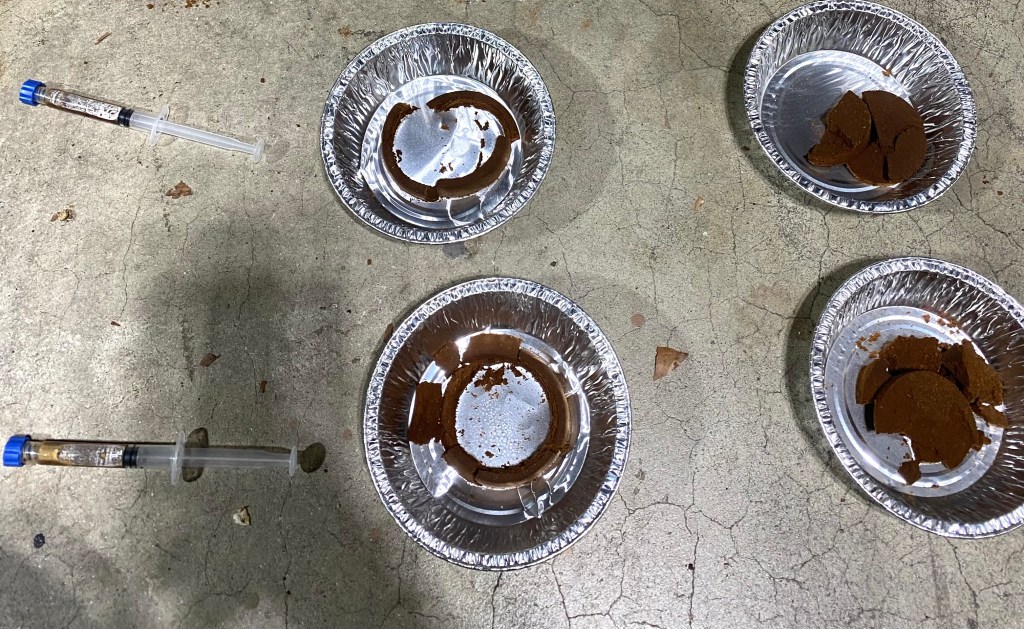
- The drink was stirred vigorously with a demitasse spoon and a luer lock syringe was used to then draw between 2-3 ml of espresso from the cup (with the tip of the syringe ensured to be around midway between top of brew and bottom of cup), sealed by screwing in a luer lock syringe cap to prevent evaporation, and the rest of the espresso was discarded.
- The portafilter was removed immediately following the shot’s end to prevent any pooled water on top from affecting results by discarding said pooled water.
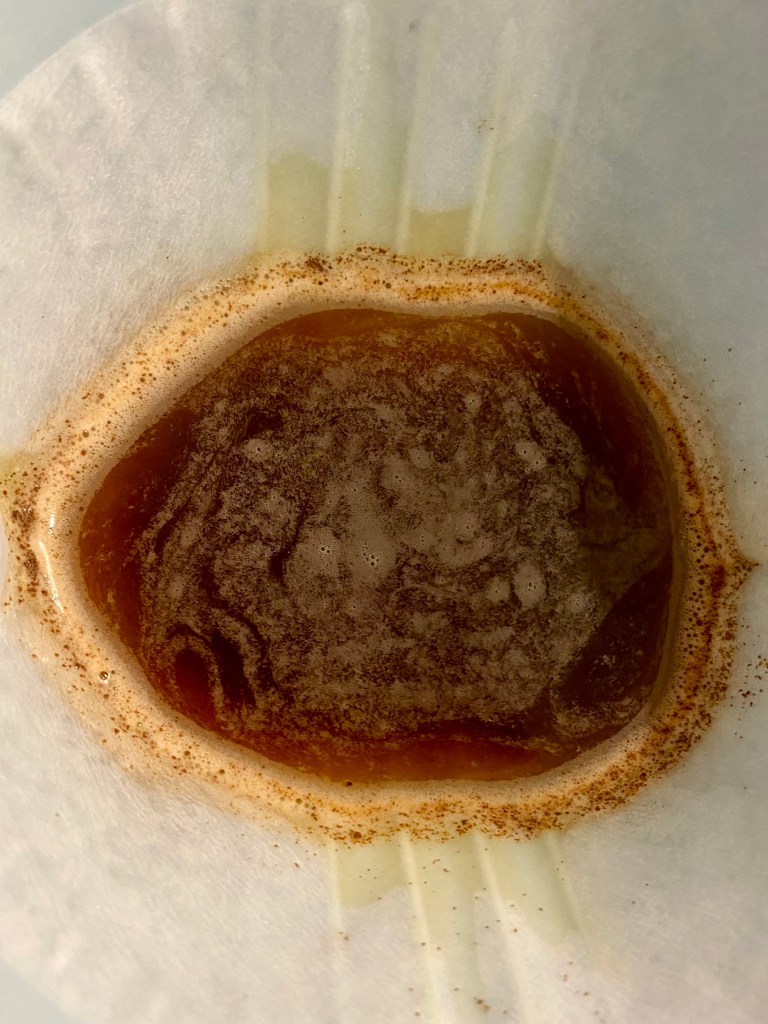
Next let’s talk about how the spent pucks were collected.
- After each shot was pulled, as little time possible was spent between when the shot was pulled to when the spent puck was carefully knocked out into an aluminum bowl. The insistence on keeping the time delta as low as possible is to avoid capillary action within the puck which can skew results. I was going with the assumption that such capillary action is adding to error until I insert the cookie cutter
- Sworks pucks were more difficult to knock out in comparison to vst. In such cases I gently tapped the top end of the portafilter upside down against the bottom of the bowl after placing said bowl on a solid surface. This almost always ensured that the puck came out without disintegrating. In situations where it didn’t, I would discard the puck and pull the shot again.
- I would then carefully insert a cookie cutter as concentrically as possible by eyeballing. The center section of the puck now inside the cookie cutter would then be transferred to another aluminum bowl, and any remnants on the outer side of the cookie cutter would be added back to the original bowl since it’s technically part of the “edge”. I also ensured that the inner surface of the cookie cutter was properly scraped and any remnant bits from the inside added back to the second bowl
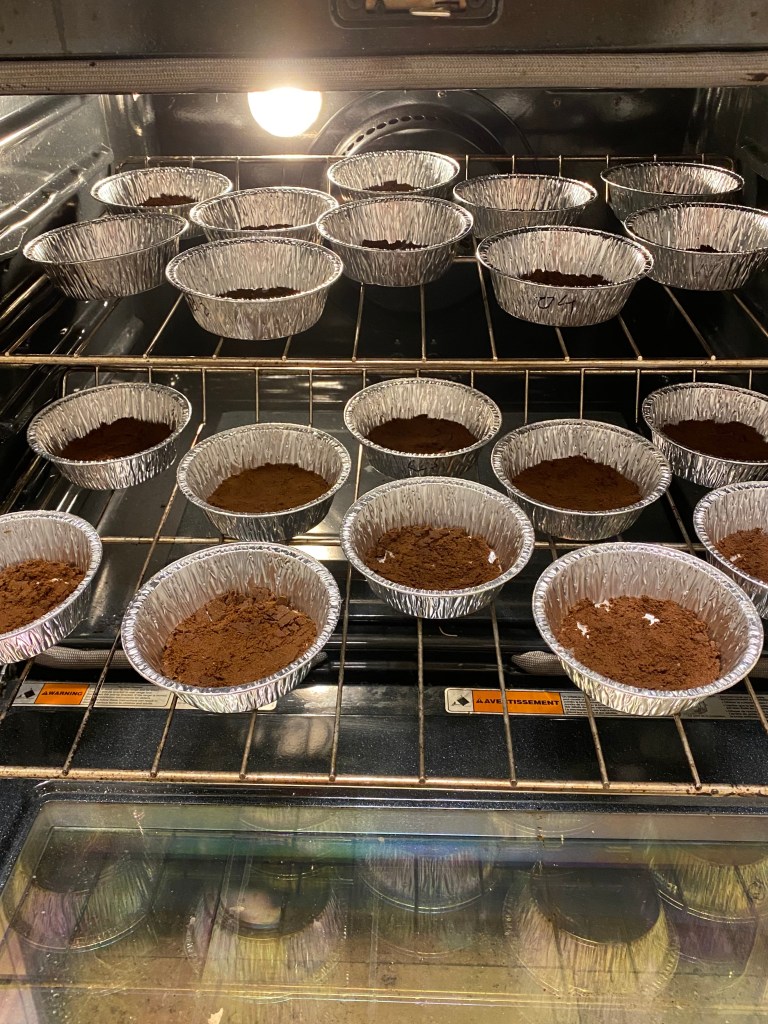
- Each aluminum bowl was labeled according to shot number and whether it’s the center or outer section using a permanent marker, so the label wouldn’t disintegrate when drying spent puck coutouts in the oven.
- The bowls were then placed in an oven and dried at 250°F (the lowest my oven could go) for 8 hours to ensure all water has evaporated.
- Depending on the day, between ten and twenty bowls were dried at a time, with each shot having produced two bowls, and each group of ten bowls being results of five shots from a given category pulled back-to-back.
Here’s how tds for the espresso samples in the syringe was measured:
- The syringe was shaken to ensure sample homogeneity
- The luer lock syringe cap was unscrewed and the first few drops were discarded to reduce error
- A few drops were then put on the refractometer lens (I didn’t use the cupping spoon technique here because the sample temperature was already very close to room temperature).
- Readings of the unfiltered sample were taken till I got three readings of the same value in a row
- A syringe filter (Admas Beta Titan 25 mm Nylon membrane 0.22 um pore size) was then attached, and the espresso sample was gently pushed through the filter onto the refractometer lens. Readings were taken till I got three of the same value consecutively.
- After each espresso sample measurement, the lens was first cleaned with alcohol and then distilled water.
- Each sample measurement was ensured to be within 0.2°C of the zero calibration temperature
- Zero calibration was done with distilled water
Finally, here’s how the dried sections were extracted:
- Dried grounds were measured with a 0.1g accuracy scale
- Each dried section was then put in a clever dripper prepped with a rinsed tabbed V60 size-02 bleached filter
- Water at 100°C with a mass of about 20 times the weight of dose was poured into the clever dripper and timer was started
- The slurry was declumped and saturated thoroughly using a WDT
- At the end of ten minutes, each brew was strained into a separate carafe
- Each clever dripper was thoroughly shaken to ensure there’s very little of the brew left in the deadspace below the filter
- Each brew’s EY was then measured using the technique outlined here
The error sized elephant in the room
I had a bit of a panic attack when I realized halfway through my experiment that I was using a 0.1g precision scale. It made me wonder if the error introduced due to this level of precision is higher than what the refractometer is subject to. Fortunately a certain Michael Cooper who does coffee quantitatively came to my rescue. Cooper was kind enough to calculate percentage error introduced into EY calculations as 2.5% of the coffee’s tds value. With 0.74 tds being the highest tds I measured when brewing the spent puck samples, this brings the error in EY measurement to about 0.019 tds. The question is, does this supersede the refractometer’s error.
Atago claims an accuracy of ±0.15 tds, which is a significantly high amount. However unlike VST, Atago doesn’t specifically mention how much their error changes based on tds value. For example VST lists that for samples upto tds of 4%, the error is 0.03 tds and 0.05 tds for values higher than that. If we were to assume that with our temperature compensation protocol the Atago’s accuracy is as good as VST’s, the tds error introduced due to using a 0.1g scale is still less than that when it comes to evaluating spent pucks.
There are however other sources of error that I have no way of accounting for, but it’s important to acknowledge them:
- Changes in bean structure and therefore grind distribution in coffee depite roast age (future experiments will have me ensuring that coffee for experiments are from a single roast batch, and if possible from a single producer)
- Tiny bits of coffee stuck to the puck screen
- Tiny bits of coffee stuck to paper on top
- Possible tiny amounts lost when using cookie cutter despite trying my best to not lose any
- Volatiles lost to drying at 250°F for a long duration.
- Tiny amounts of brew in clever dripper’s deadspace
- Solubles lost to syringe filter (the assumption here is that nylon filters won’t interact with compounds that can be isolated using spectrometry, which should in theory apply to most coffee compounds but may not be an accurate assumption)
As an effort to better track losses due to such sources (barring the last one), I have in my data included a field that calculates the delta between remainder mass based on unfiltered EY and actual remainder mass based on spent puck. While not perfect, it’s the only way I could think of that allowed me to get some idea of what samples to potentially reject beyond the visually evident ones where I made a mistake when handling samples.
Over the next few weeks I’ll post results for the different comparisons outlined earlier.
Acknowledgements:
- Lance Hedrick for his skepticism
- Christopher Feran for continually motivating me through an intense period of data collection
- Michael Cooper for kindly helping with error analysis, and upping the standards of this blog
Subscribe to keep your pocket updated with coffee science.

Leave a comment