A Mazzer Superjolly is infamous for being built like a tank. After ages of use in a cafe, however, and having been through the hands of at least two people before it came in my possession, it’s reasonable to assume that some mobile parts of my Frankenjolly will need replacement.
One fine day
When you use a piece of equipment day in and day out, subtle changes in its behavior become noticeable. And it so happened that despite the Frankenjolly’s relative loudness as compared to modern titan grinders, I could hear a new shrill sound whose frequency seemed to align with the motor’s rotation. My worst fears would end up being confirmed when right after, coffees that were delivering stellar shots, all of a sudden could not build any puck resistance at the same or smaller burr gaps.
What began was a series of nerve-wracking moments, which in retrospect seem somewhat unjustified in terms of anxiety, but who knew. Resources for Superjolly bearing replacement are not the easiest to come by, but this one post on Home Barista was extremely helpful in terms of navigating what to expect as you step through the process.
What bearing?
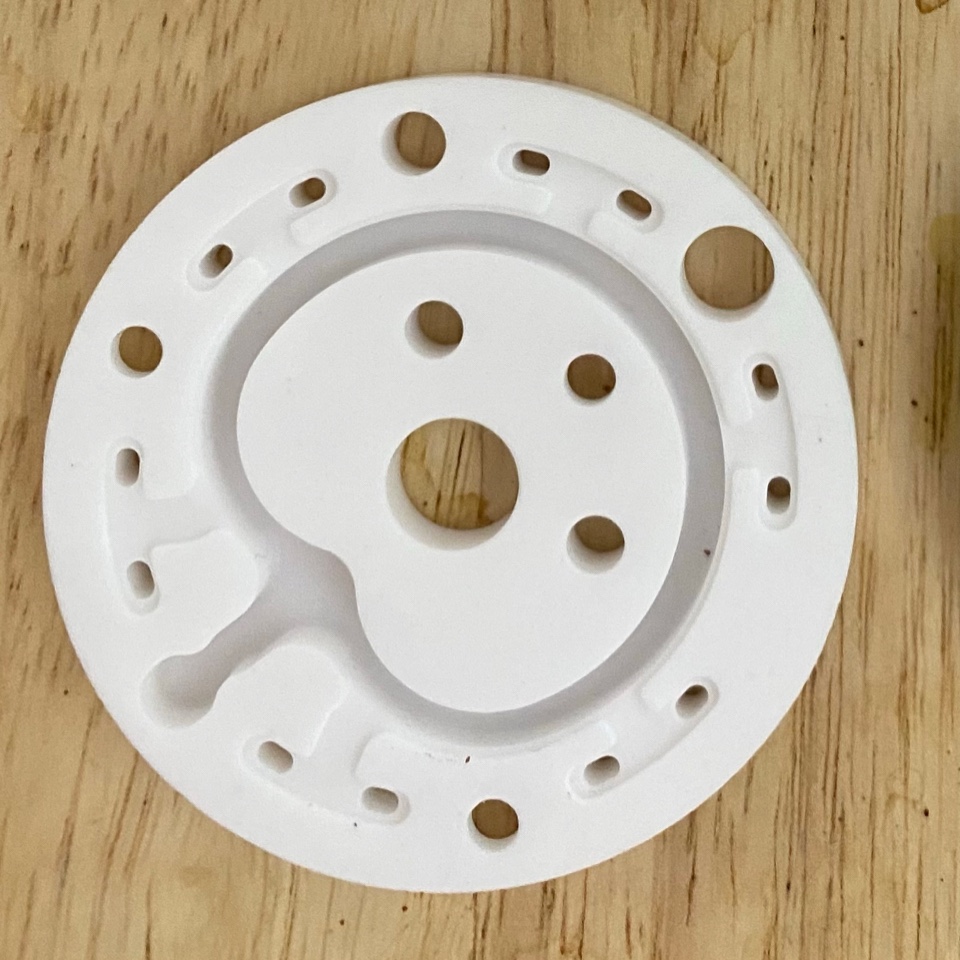
Since my bet was on the upper bearing having been affected, that’s the one I intended to pop out first. However, I was about to run into a bit of a challenge (some of which I was expecting courtesy of the home-barista post). Popping out the bottom carrier on a Superjolly is a bit of an ordeal already, something that I’ve outlined in an Instagram story a while ago when I talked about aligning burrs on a Superjolly (twas a doozy). However, it’s the part that comes after the bottom carrier that turned out more perplexing. There’s a protective plate (or “bearing cap” as is the part’s official name) that sits screwed atop the upper bearing which just refused to come out despite removing the screws. Ultimately, a cheap heat gun from Home Depot indeed did the trick and I was able to pry it open. And the photo below will reveal why it was glued on.
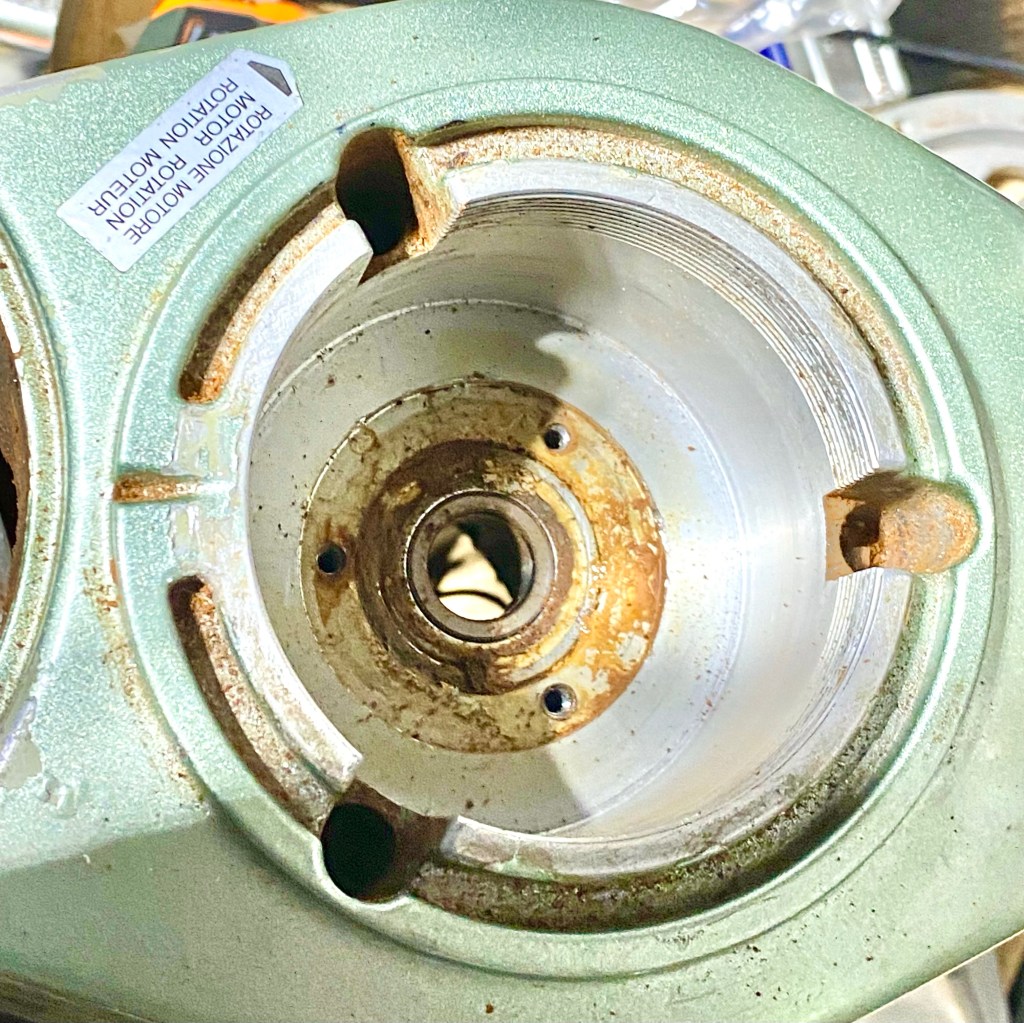
Years of usage probably resulted in tons of fines and oils seeping through the gap between the plate and the bearing, resulting in a glue-like formation. I also don’t know if the original assembly involved application of grease which could have possibly compounded the issue.
Just the bearing you say
The next step was to pop out the bearing, of course. Only that entails the following:
- Removing the base plate
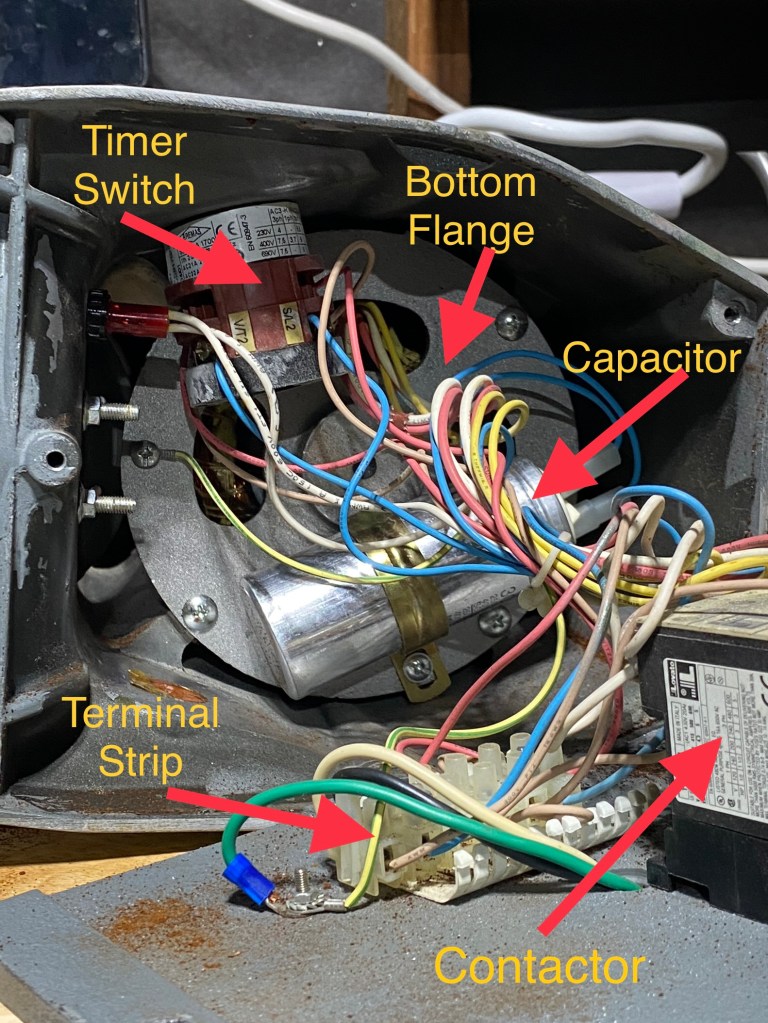
- Removing the terminal strip
- Removing the contactor
- Removing the timer switch
- Removing the dial switch
- Removing the capacitor
- For all of the above steps carefully labeling and removing each wire and noting the component and respective terminal it was attached to
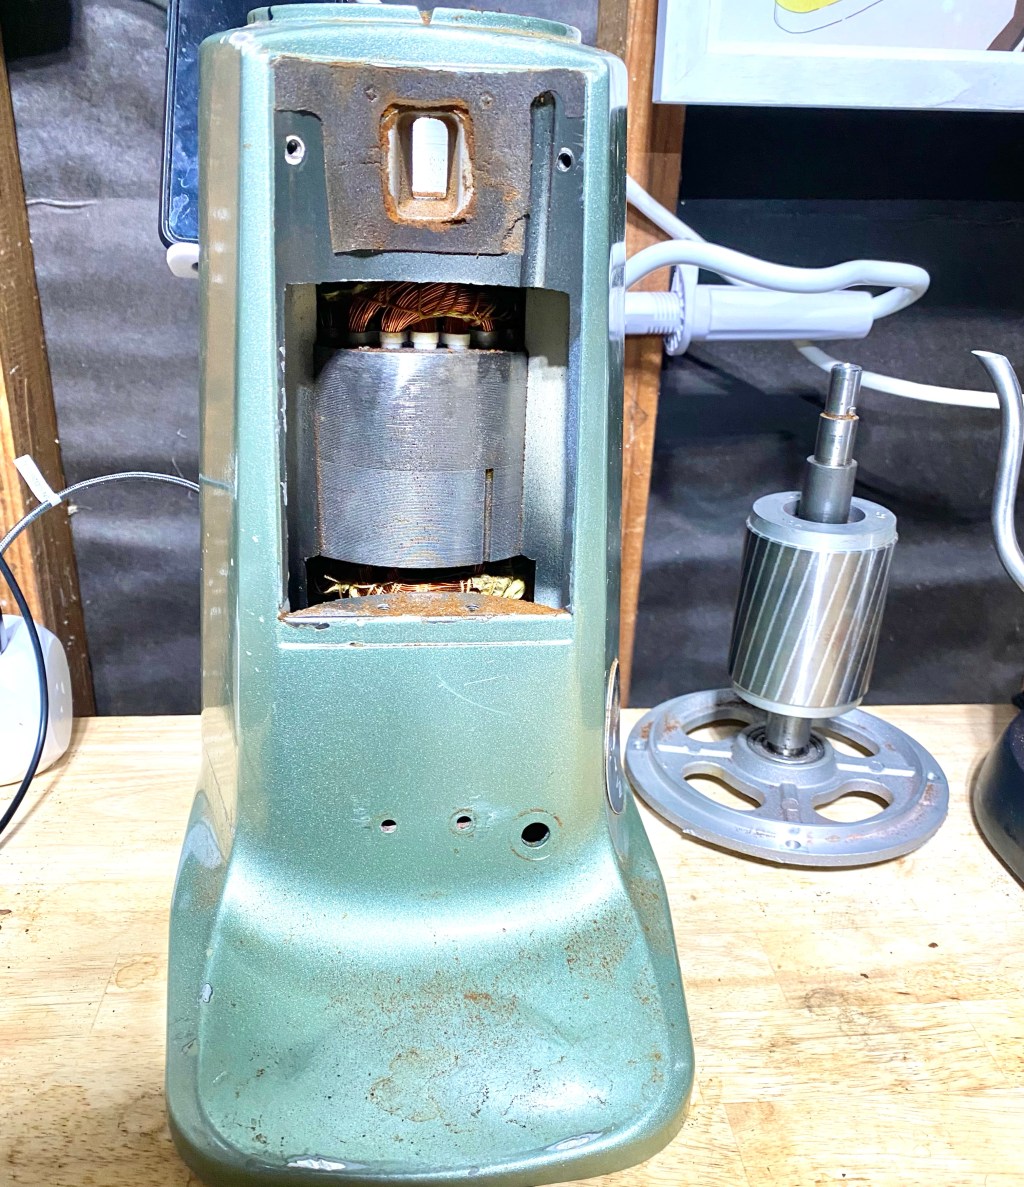
- Removing the bottom flange that contains the bottom bearing into which the rotor shaft slots
- Gently hammering on the rotor shaft from top till it drops down (keeping it horizontal when doing this might prevent a “thud” as the flange+rotor drops)
- Inverting the grinder and using a long rod-like object to hammer out the upper bearing

Seal it or shield it?
There’s a tiny detail about bearings that I think Mazzer originally overlooked. When I began looking up bearings, I was surprised to find that Mazzer used shielded as opposed to sealed bearings. There could be two reasons to justify such a decision. One is cost, that is Mazzer may have wanted to save like $2 on each bearing. The other is that the rotor operates at an rpm that is much more than a sealed bearing can handle. Sealed bearings seemed to be rated for 15000 rpm. The rotor operates at 1600 rpm. Yeah, didn’t make sense to me either. All the more weird when you realize their “official” Superjolly replacement bearing is a sealed bearing.
The reason I’m making a big deal out of this is because sealed bearings are designed to be able to keep particulates from getting in. Shielded bearings do it to some extent, but we’re talking years of cafe usage, most of which were probably spent grinding beans that were roasted to oily levels. For all you know, a sealed bearing would not have landed me in such a situation.

This “official” bearing can be found on grinder parts sites for $31, but the same NSK bearing can be found elsewhere for $6. Not only that, if you are okay with getting off-brand sealed bearings, you can get them at $2 a piece from either Amazon or a hardware store that stocks these.
Thump thump
Not every person who wants to replace grinder bearings has a bearing press. Now if you have access to a local mechanical workshop that own a bearing press, it’s of course a good idea, especially if they aren’t expensive. In absence of a bearing press though, I had to cut out a wooden block of thickness just slightly larger than the width of the bearing, place it upon the upper bearing and gently hammer it into the socket.

Popping out the bottom bearing in the lower flange can be a bit tricky and ultimately not necessary if it seems functional (like mine was). However I didn’t like the idea of a shielded bearing anywhere near coffee grounds so I got to popping that out. Much like in the home-barista post, I got a slightly long m8x1.25 thread pitch bolt to screw in from the bottom till it was enough to push out the rotor shaft. I placed the flange upside-down on two parallel strips of wood (spare 2x4s work well for this) used the heat gun to warm up and expand the flange socket and hammer it in the center till the bearing (finally) fell out. Unlike the home-barista post, I first put the new bearing into the socket and then popped in the rotor shaft which it did without complaint.

Where does this go?
I learned the hard way that if you use thermal print label makers to carefully label your wires and use a heat-gun, all you’ll get in the end for your effort is a bunch of blacked out labels that you won’t know what to do with. Thankfully, EAF exists and I got help users JakeG and Brewtus to sort out the wiring. The whole exchange is a bit long for being included in a blog post but you can go through the discussion here.
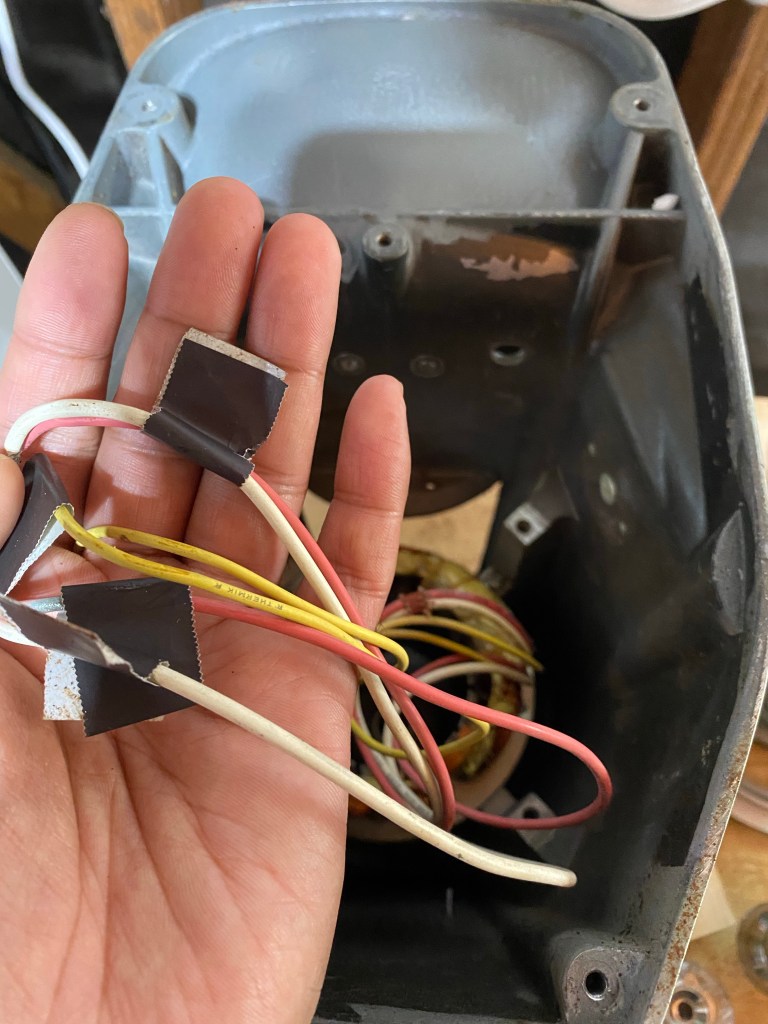
In summary, I was able to rewire the Superjolly with help from folks in the thread and by referring to this Superjolly wiring diagram that I found in a random corner of the interweb. Although the Superjolly may not be the prettiest grinder, I think it is a relatively approachable one in terms of both the mechanics and the electricals.
Could you make espresso again
After popping the rotor and flange back into the upper bearing, rewiring the grinder, putting back the bearing shield plate and lower burr carrier, screwing in the burrs, I was anxiously hoping that all my worries would be resolved. Well almost. Although the sound of a worn bearing was now noticeably absent, I still could not grind fine enough for espresso. However I will talk about burr alignment in part 2 of this story because I think that deserves it’s own post (and gives you folks who made it this far a break).
Acknowledgements
- JakeG and Brewtus of EAF for helping sort out the wiring
- Mat North for helping confirm it’s a worn bearing issue
If you’ve made it till here, consider supporting NOT me, but the hourly coffee worker by donating to GoFundBean
Subscribe to keep your pocket updated with coffee science

Leave a comment