
This post is intended for folks intending to use aftermarket burrs in an 064s. If you’re happy with the taste results of stock burrs or are intending to purchase an 064s and never intend to swap burrs, this post isn’t for you, and I’d recommend not reading beyond this point. It’s truly a great grinder for its pricepoint and for what it intended to achieve. The rest of you, buckle up, it’s gonna be a long one.
Coffee enthusiasts have never been more spoiled. Just a little more than three years ago, the only “modern” grinder on offer to use 64 mm burrs for both filter and espresso was the P64. Outside of that, some were retrofitting them in grinders that were more than a decade old, if not more. Lance Hedrick did a spectacular video on budget grinders available on AliExpress that one could retrofit with aftermarket burrs. And then the home grinder world changed. A certain Turin DF64 entered the market and folks didn’t have to either empty their bank accounts for a P64 or question their life choices. Turin/G-iota was only the first in line in a bunch of brands to try and capture the sub-1000 USD grinder market, most of who piqued interest, but probably didn’t differentiate themselves enough from DF grinders both in terms of features or price to warrant as much attention. That is till Timemore entered the market.
The enthusiast problem
For every grinder released in the market, especially when it comes to making espresso at home, I tend to ask a couple of questions (that usually no one has answers for) – who’s the intended audience, and are the design team and taste-test panel calibrated or even aware of an increasingly growing customer base whose penchant for exploring various aspects of the seemingly limitless taste regime of coffee leads them to swap burrs out barely a week into owning a grinder.
Timemore clearly weren’t expecting that a fairly good chunk of their customers will be doing this. They got many things right in 064s – the form factor (sleek and fairly small), a single-dosing hopper (not a perfect design but it exists), not much exchange, a rather fantastic “clicker” mechanism for neatly collecting and dislodging particles caught due to static, and a solid set of espresso-focused burrs that have surprisingly good amount of flavor separation in espresso range (but not in filter range), all at the price point of USD 550 at the time I purchased it. 550 buckaroos is a huge amount of money for most folks, so to spend that much money only to find out that the ease with which folks speak of swapping burrs on other grinders, is a rather cumbersome task on this grinder.
The maze
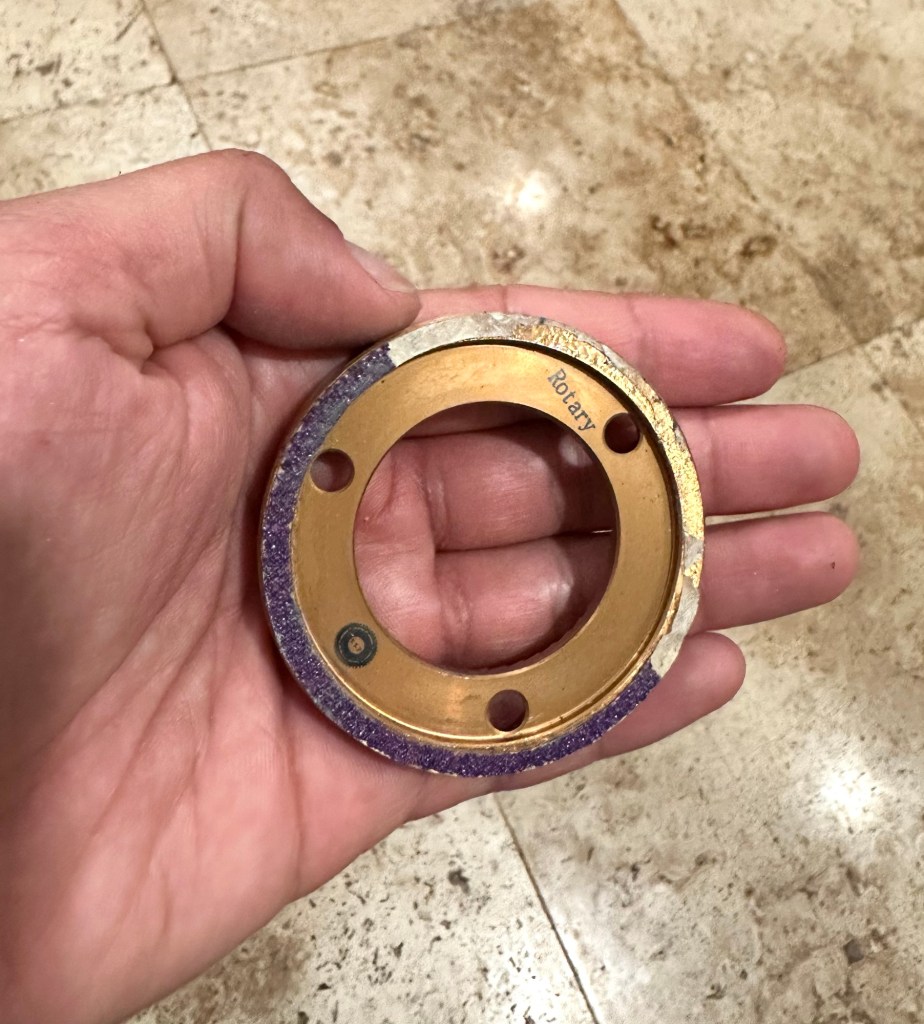
To access the burrs, one needs to first pull and detach the grind adjustment dial from the locating plate. On the unit I bought, good luck doing that with anything but the driest of fingers and just the perfect amount of force. Most times I don’t bother and just unscrew the dial and the locating plate together. Oh wait, that’s not possible unless you first shorten the positioning pin by cutting it short (with something like diagonal pliers; EAF user newdent was probably the first one to attempt and recommend this), so it can still screw into the locating plate so it can attach to the adjustment dial, but not so long that it can still bump against the pins in the outer burr support plate (referred to as “support plate” going forward). All of this even before we get inside the grinder.
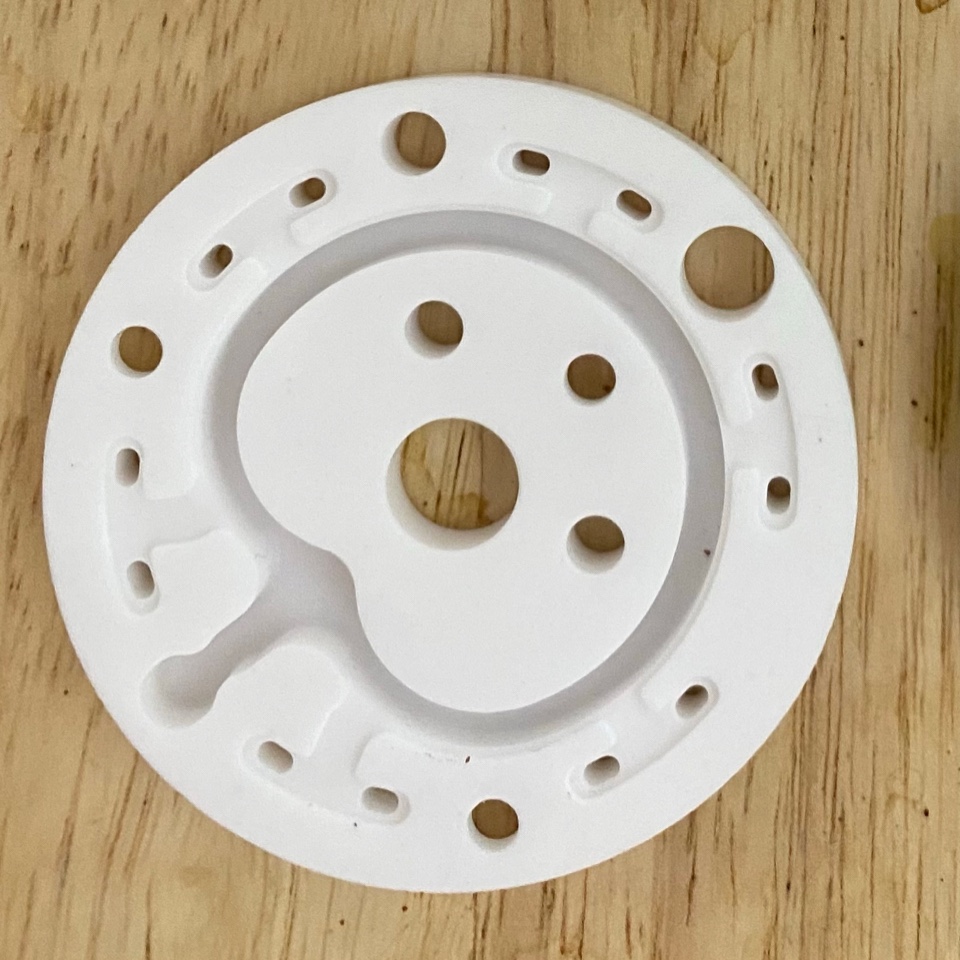
Once the locating plate is unscrewed, we come to (in my opinion) the most frustrating design decision in the grinder a user has to face from an alignment perspective – a support plate attached to the grinder’s frame with six (six!) thin hex screws. One of these screws is blocked from access with a tiny piece of tape that clearly states that your warranty is void if you remove these screws. Which is ironic because you can neither clean the burr chamber or the stock burrs themselves if you don’t do that.
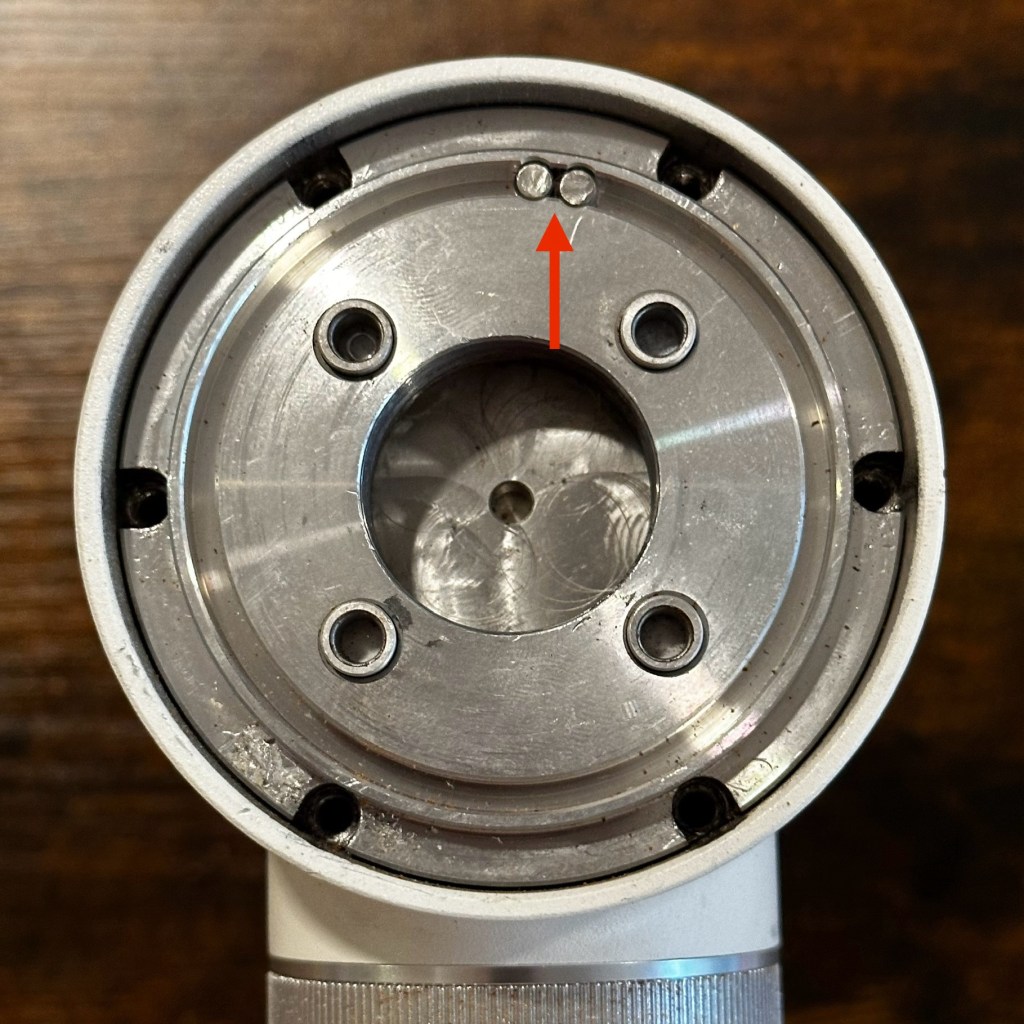
The support plate itself consists of two parts – a housing for the bearing that the rotating burr carrier leverages to spin (I haven’t found a way to access the inside of said housing), and the plate itself that screws on to the grinder frame. One side of the bearing housing has two concave slots into which the rotating carrier’s pins will loosely fit, and the other side has four pins of its own that slot into the four holes of the plate. Keep these details in mind because they’ve resulted in some facepalm moments when putting things back together.
Finally, the burrs
The burrs reside in a chamber that’s auger-fed, with said auger being part of the rotating carrier. The threads in the auger seem to work both as a pre-breaker and feed the pre-broken beans to the burrs to grind. For the rpm range and motor power the grinder has, the auger design is sufficient to do what it was designed without stalling the grinder. Plug in a well aligned set of SSP 64MP (64 mm multipurpose) burrs with red-speed coating however, and very soon it becomes a nightmare if you don’t slow feed the beans when grinding for espresso. Both at 800 rpm (lowest rpm) and 1200 rpm (highest rpm), the auger seems to deliver beens to the burrs faster than they can grind and spit out through the chute and the result can be seen in the photo below.

Wanting to align an 064s, specifically for something like 64MP, gave me pause for thought. Self-alignment by sanding, or the approach of taping burrs to one another so they’re parallel to each other and then putting sandpaper on the back side of the burr that’s not attached to the carrier, and spinning the glued burrs to sand the free carrier, is a bit of a challenge in 064s. While this can be conveniently (*cough*) done in an EK43 or Superjolly, there’s a couple of problems if one wants to do this in 064s:
- There’s no way to spin the shaft like in the superjolly, or alternatively the carrier itself like in EK43.
- If you leave one of the burrs free (unscrewed) in the carrier, the burrs fit so tightly, that the friction of that combined with the friction of sandpaper will result in the burrs getting untaped from each other instead of guiding the sanding.

This made me try and shim with stainless steel shims instead. This is as good a time as any to tell you that if you want your alignment to be retained, NEVER EVER use aluminum shims (e.g. aluminum foil). Aluminum compresses under load and the spacing at which you thought you aligned it, won’t remain the same after a period of use. I had some spare 50, 20 and 10 um shims in stock (because someone needed to align their superjolly after their bearing gave up). Which also meant that it was time to do the marker test to check whether I needed alignment or not. This in turn meant putting back the stack together to be able to turn the motor on. Which is basically the steps we did to access the burrs but in reverse.
When doing the steps in reverse it’s absolutely crucial to ensure that the small rods projecting out of the moving carrier fit exactly in the concave slots in the bearing housing. Timemore doesn’t really emphasize this in their instructions anywhere, but this wasn’t intuitive to me. If you don’t ensure this, and instead put the stack back together with the dial tightened all the way, your rotating carrier will wobble like jelly in the burr chamber, making a horrendous noise that will make a screaming toddler sound blissful. No, you can’t ask how I know this.

You then screw the support plate back on with its six screws, screw in the locating plate, screw in the positioning pin, slide in the adjustment dial, and make sure you have gone so fine that you can’t turn the dial anymore (again made easier by cutting and and shortening the positioning pin). Then turn dial back to make the setting a little coarse so you’re not quite at chirp but fairly close. If you happen to turn the motor on if the dial is way too coarse, you’re going to hear the same aforementioned horrendous noise, this time sure to induce a panic attack. No, you can’t ask how I know this either.
Turn the motor on and keep going finer till you hear a screech (video 1). The way the screech sounds will be different based on burrs and how aligned they are. But this screech is your “chirp”. It’s imperative that you approach the chirp point as slowly and gently as possible when determining chirp. Even going a little bit too fine will push the burrs close enough together that they’ll wipe the marker off enough to make it seem like they’re parallel, when in reality some parts of the burr may have touched prior to other parts. We then access the burr chamber again, i.e., yet again remove the dial + locating plate, remove six hex screws, remove support plate + bearing housing and then remove the rotating carrier to check the result. In my case there was barely any wipe on the rotating burr and a full wipe on the stationary burr.
Time to shim
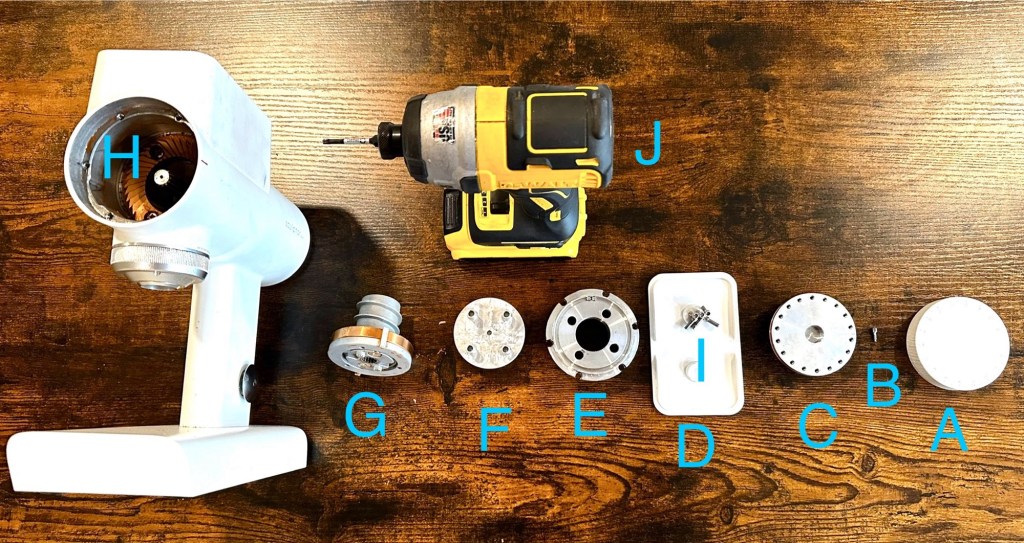
I started out putting a tiny sliver of the 50 um shim under the burr, opposite to the region where there was some wipe. 50 um is a big enough delta to determine if sanding needs to be attempted. Imagine my surprise then, when I couldn’t improve the wipe even by stacking two 50 um shims. Yes, this indeed means I went through the tedious process of assembling and disassembling the stack for every slice of shim. This is also why I found it useful to use an impact driver as opposed to a screwdriver (one can also use a drill). This makes removing the six hex screws significantly faster than if doing manually, although it’s still annoying. At this point I’ve accessed the burr chamber from scratch conservatively twenty times, if not more. Note that I didn’t use the impact driver in “impact” mode, i.e., I used it at its lowest setting without the hammering option. This way the driver gives up when it can’t turn the screw anymore, and in theory that “maximum” torque should be consistent across all screws. Please feel free to correct me on this by leaving a comment below.
It was clear that I needed to sand but I didn’t have a sureshot way. What I ended up doing was the most hilarious approach to sanding that one can think of and one that I’m hoping someone makes an improvement on because I still find it funny. What I’m about to describe is a refined version of my first attempt, so you don’t have to repeat my mistakes.
That does not look like fun

Choosing the right grit of sandpaper is key. While I initially thought that just one round of sanding like in the superjolly would be fine, I wasn’t convinced that would be the case here because of how high the starting delta was. From the options I had, 80 grit was the coarsest. Most resources I came across listed the approximate equivalent precision of abrasion as 212 um. The intent was to sand and remove a good amount in one go because your hands will otherwise get tired. The reason is the sanding workflow is as follows:
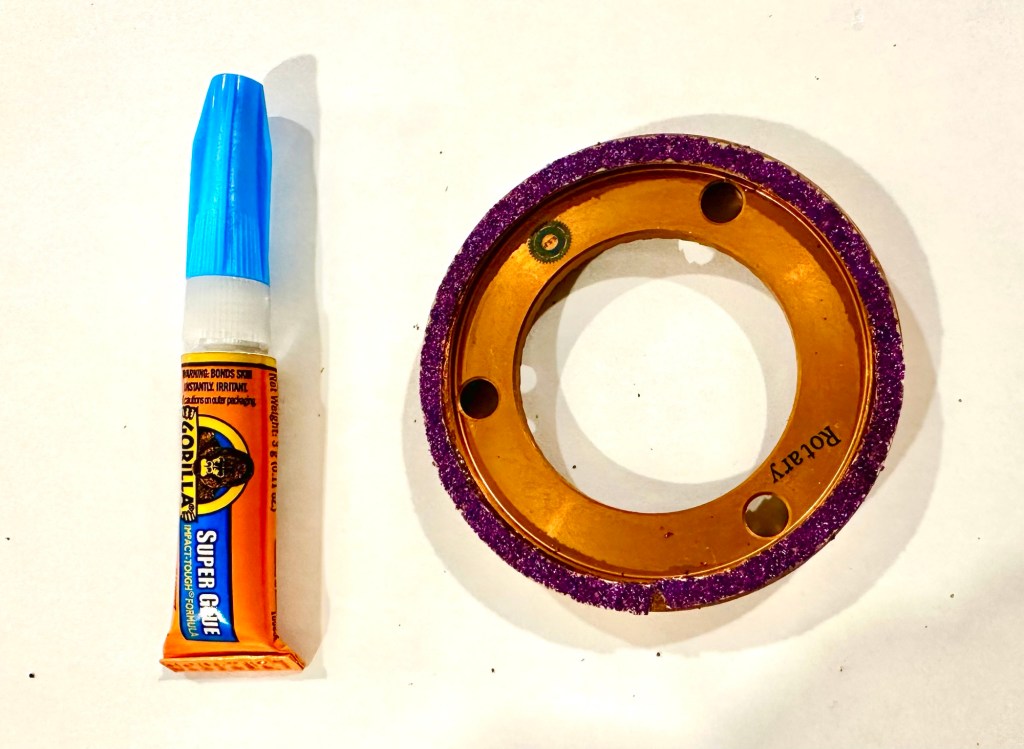
- Begin by making a concentric cutout of the sandpaper (fig. 5) whose outer diameter is 64 mm and inner diameter is 60 mm. If you’re doing this for 078 family then cutout size will be different.
- Put on a pair of cheap latex or vinyl gloves that are snug against your fingers.
- Glue this sandpaper cutout to the mating surface (the part where it touches the carrier) of the rotating burr with superglue (I used gorilla superglue but you can use an equivalent based on where you live). I settled on superglue after trying various other adhesives, all of which slipped and detached from the burr under force.
- Thank the gloves because they just saved your skin from getting superglue on them.
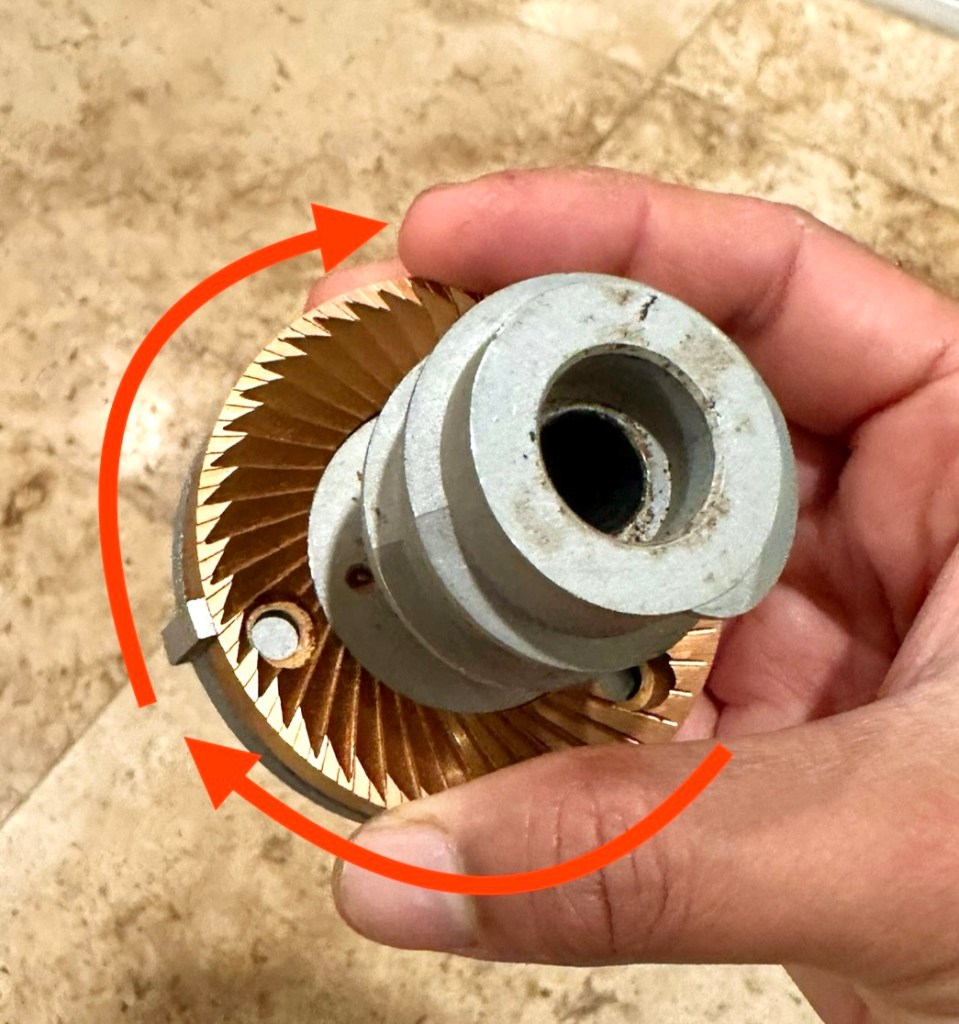
- The burr is left unscrewed.
- Hold the non-auger end of the carrier firmly with one hand.
- Press the burr + sandpaper firmly against the carrier, and slowly spin the burr to cause abrasion (fig. 6). With this action you’re removing tiny chunks of the carrier (about 200 um worth) and slowly getting it parallel to the burr. Do this for about five minutes (you can time it to Kendrick Lamar’s “Not Like Us“)
- Drench the rear side of the burr in an adhesive remover like Goo-Gone (oil might be an alternative). Let it soak for ten minutes and then slowly chip away with a utility knife (short blades work better).
- Question your life choices that led you to doing this
We then repeat the same process with a higher grit sandpaper. I used 400 grit for the second round which gives a precision of around 44 um.
Does it even work
It was time to pull out the marker once again. After assembling, grinding at bare minimum chirp, and disassembling the stack again, to my joy and disbelief I got a near perfect wipe. This is the point at which I usually test how good of an alignment I got by putting a 20 um shim under the region that didn’t get wiped. However, upon putting the 20 um shim the burr seemed to give a very uneven wipe all over the perimeter. This leads me to suspect that the unit I purchased may have some amount of taco-ing (if the shaft is bent by a tiny amount, it’s possible to get segregated wipes). If however the wipe would have moved on to the part where i shimmed it, it’s probably a strong indication that I got the burrs to align within 20 um of perfectly parallel alignment. But I was tired of all this. And I had one more metric to check: lock-to-chirp.
Determining lock-to-chirp in 064s is a bit inconvenient. Here’s how you go about doing it:
- Remove the silicone plugs in your hopper to gain access to two tiny philips-head screws.
- Unscrew them with a small screwdriver (I used a size 3.5 head, whatever that means)
- Remove the hopper and the filament screen.
- Take adjustment dial all the way to chirp and note your chirp setting. Turn off the motor.
- Go finer in tiny steps. At each step, try turning the auger firmly but not too firmly with your finger of choice. At some point the friction of the burrs touching each other won’t allow you to move it turn it any further. Note the setting. This is your “lock” (video 2).
- Calculate the difference between lock to chirp as 3.3 x number of small notches from chirp (the number per notch maybe different for other grinders in the timemore’s lineup, but is 3.3 um in 064s).
You can probably already tell that this is a bit error prone and since folks have differing muscular strengths in their fingers, these results might vary between two people using the same grinder. I don’t however expect the difference to be significant. In my case, lock-to-chirp ended up being 33 um, and this to me was promising enough.
Last but not least, and this isn’t strictly necessary, but if you prefer having zero close to chirp like I do, it helps to put the positioning pin in a hole that will allow for zero to sit closer to chirp (thanks to EAF user Gnoca for recommending this).
Was it worth it
I’ve talked ad nauseam on this blog about the importance of alignment when it comes to fast-extracting burrs like 64MP, which are also fairly low fines. Aligning the burrs allows one to grind a lot coarser than you would otherwise would for espresso (usually a good thing for evenness), while allowing for better flavor separation and yield at the same burr gap from chirp in the delicious 1:2 dense, sticky, textured dessert like shots I love and adore making with these burrs. Anecdotally I’ve also found them to give better flavor separation post-alignment in filter range as well. As an icing on cake, I plugged in a set of SSP 64 mm brew burrs (also colloquially called UMV1) and they were well aligned out of the box even though I sanded with 64MP (UMV2). Also since I’m intending to mostly use 64MP like 95% of the time in this grinder, the time and effort spent on aligning them and then not having to look back is an acceptable compromise, despite the annoyance. Remember, 550 buckaroos is a fuckton of money and I want to get every bit of deliciousness I can get from the grinder for my burrs.
How’s life with the machine
Every piece of equipment has its pros, annoyances and questionable choices. Let’s start with the good:
- Retains alignment well: While I complained a lot above about the process to access the burr chamber, once aligned it retains alignment very well. This is key – I’ve previously found that Fellow Ode does not retain alignment well with usage
- Does not stall in stock configuration: This is important because the same can’t be said of something like Option-O Lagom Casa (units bricked upon light usage) or even the Mini (stall and grind behavior in light roast espresso range is the norm)
- Can be aligned and taste improvements are noticeable: I was never happy with alignment capabilities and janky construction of DF64
- Clicker is a joy to use: I prefer not doing RDT
- Magnetic placement of catch cup, with catch cup height being perfect to not let stray grounds fly all around
- Hopper lid is magnetic: Allows me to conveniently store support plate screws when accessing burr chamber. The anti-popcorn “hood” is magnetic: I wonder if this increases chances of catching stones
- Small size: I wouldn’t mind putting it in a bag and take on a trip

Annoyances:
- Power button does not turn off in one go most times: Timemore has apparently offered replacement switches for folks who’ve reached out about the issue (I haven’t yet)
- Hopper is short: This results in beans popcorning when slow-feeding. There are aftermarket hopper available that address this but I don’t want to have to spend another USD 100 to fix something that should be fixed at source
- Adjustment dial can slip: There have been moments I’ve found the grind distribution looking very different than what I would expect at chosen setting. While my first instinct was to assume that the grinder wasn’t retaining alignment, I soon realized that the dial had detached from the locating plate and thus slipping.
- Tiny metal shards come off the first few timws you’re unscrewing the support plate hex screws and these need to be cleaned out thoroughly.
Questionable choices:
- Exposed spring bearing: This I think is a risky design decision. On one hand it may have made things more simple when it came ti stabilizing the shaft, but on the other hand an exposed bearing will make it easy for fines to get into the bearing and ultimately increase the risk of it seizing. To be fair, should it happen, replacing the bearing should be trivial, and it’s definitely less effort than on some other grinders.


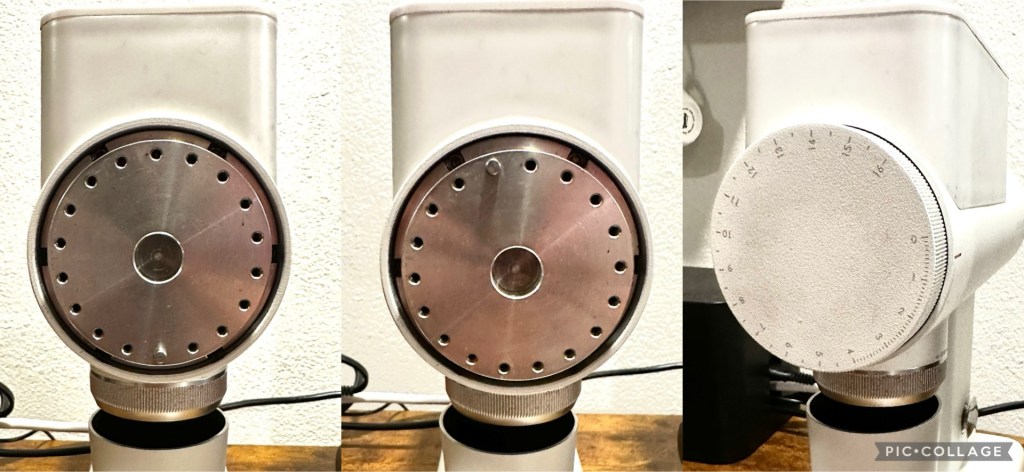
- EK-style dial: Whoever made this design choice obviously assumed the EK’s dial (among other things) is something worth copying. Here’s the problem – I haven’t seen anyone have a reasonable answer for how such a numbering system makes sense. For those of us grinding super coarse for filter, we even end up in zones on the dial which have no numbers! A more rational choice would have been choosing numbers in multiples of 10, or alternatively taking Zerno’s approach and just listing microns on the dial. Burr gap is a very useful way to communicate settings between users
- Locking pins: I’m yet to figure out the purpose of making the dial stop turning at a certain gap from burr lock, and force the user into removing the dial plate and putting it back to go any coarser. Maybe I’m missing something?
Will you keep the grinder?
Here’s the thing, in the sub-1000 USD range, if I give 064s a 6/10 for all the reasons listed above, all its competition I’ve had a chance to use or test are 4/10 at best for my needs. To get anything even remotely better, one would either need to get a DF83V with limited burr options in that range, or a Mazzer Philos which is nearly twice the price of 064s (and you would probably still need to do a one-time sand-alignment for SSP burrs). So yeah, I have no intention to let go of this grinder anytime soon.
Similarly I think most folks who have bought this grinder are going to hang on to it for a long time to come. It’s hard to achieve the combination of build quality and features at the pricepoint that Timemore has been able to deliver. My only hope is that future models have considerations for enthusiasts they didn’t account for.
Acknowledgements
- Lance Hedrick: For his initial review of Timemore 078 and confirming that the grinders retain alignment well
- Chet Schrodinger Atkins Baker: For persisting with the alignment discussion
- EAF Timemore user community: For helping in times of need and folks sharing their findings from all over the world
If you’ve enjoyed or learned something from this post, consider buying something from my favorite coffee people at Pollinator Project.
Consider subscribing to keep your pocket updated with coffee science.

Leave a reply to pocketsciencecoffee Cancel reply